|
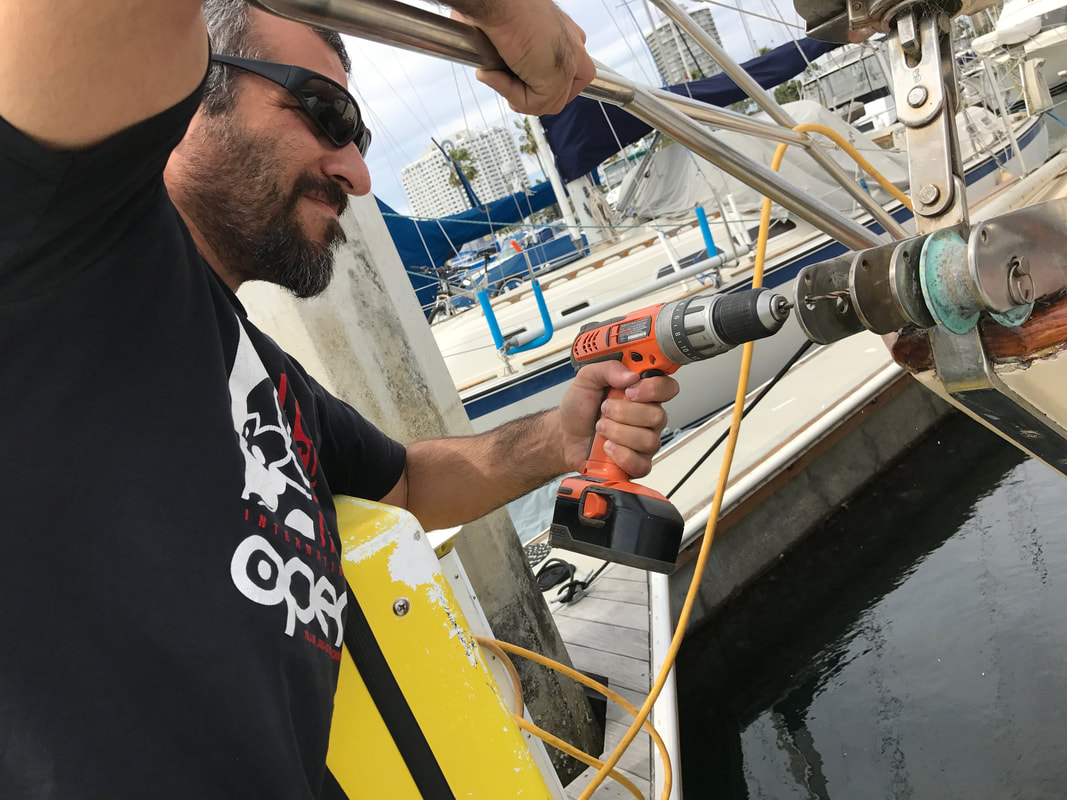
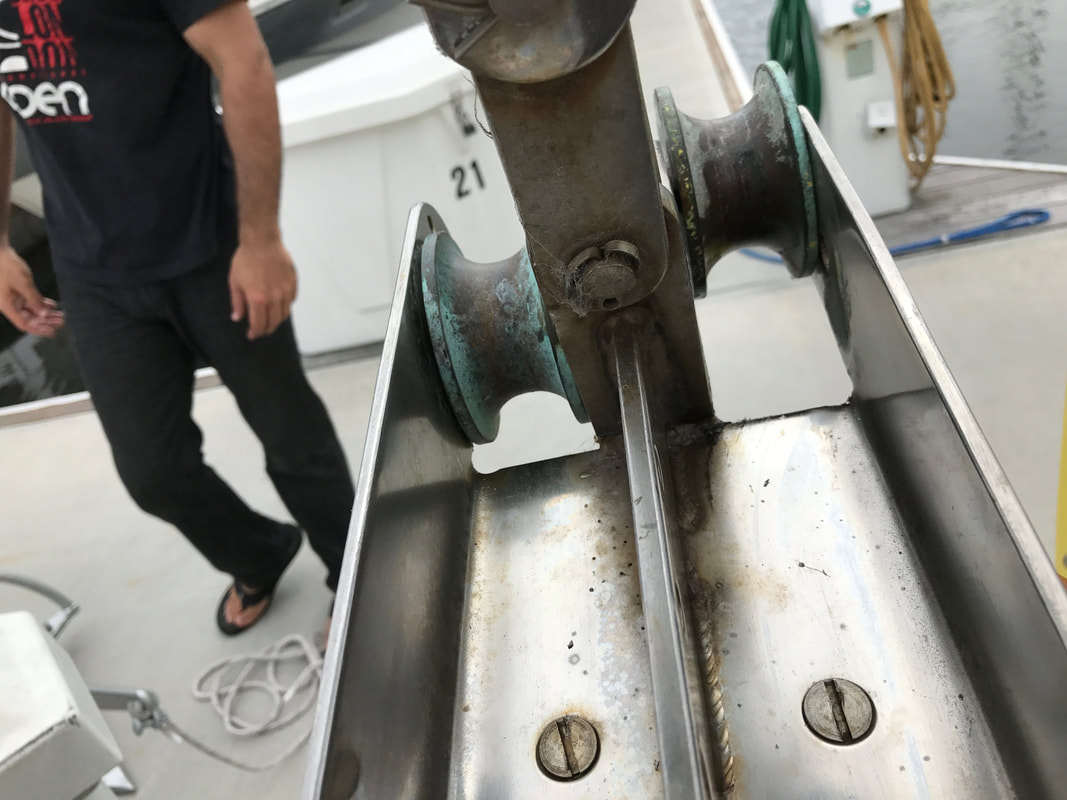
Mack has been watching a lot of YouTube videos on anchoring, which means it was only a matter of time before the Captain outfitted Kenutu with an anchor. One of our digital mates, Sailing Uma, swears by a heavy anchor. They bought a 105-pound Mantus anchor, which held them safely in place during Hurricane Matthew. From what we can tell, at least one of them is an engineer of some kind, maybe with some architecture flair, and they are constantly saying "buy a big anchor, a good anchor." They clearly know more than us, and those are the types of sailors we listen to. Which is why I was 0% surprised when this 45-pound Mantus anchor showed up on our porch. 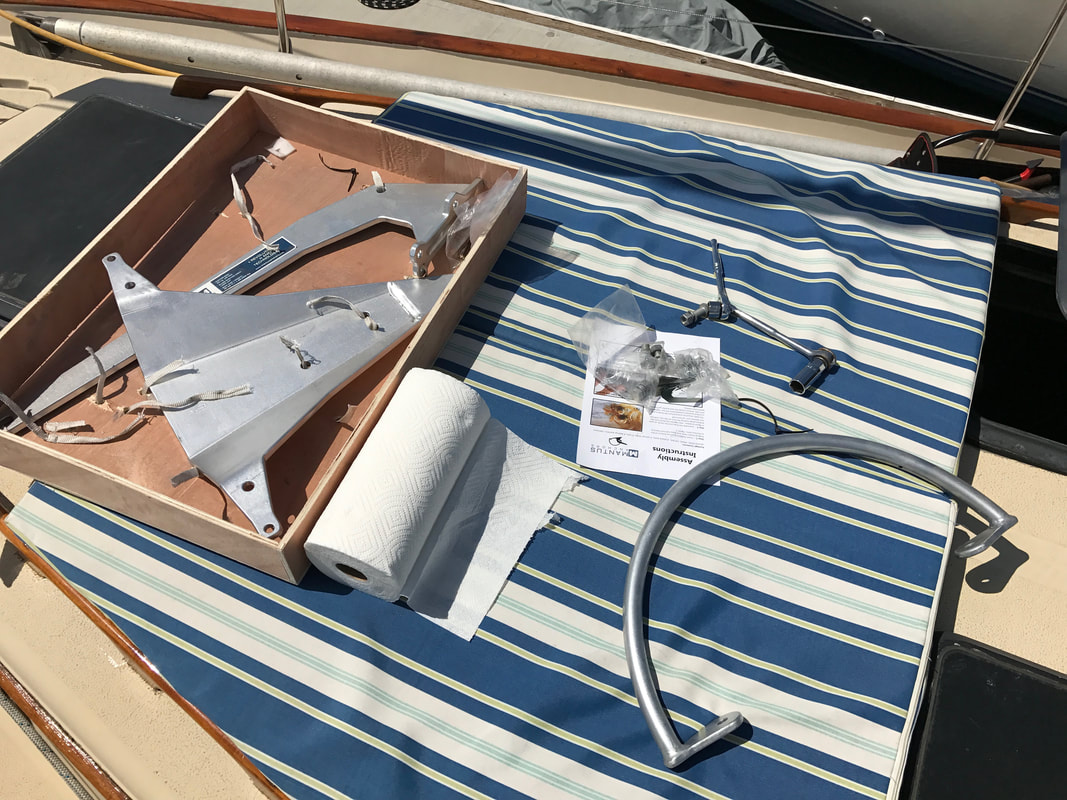 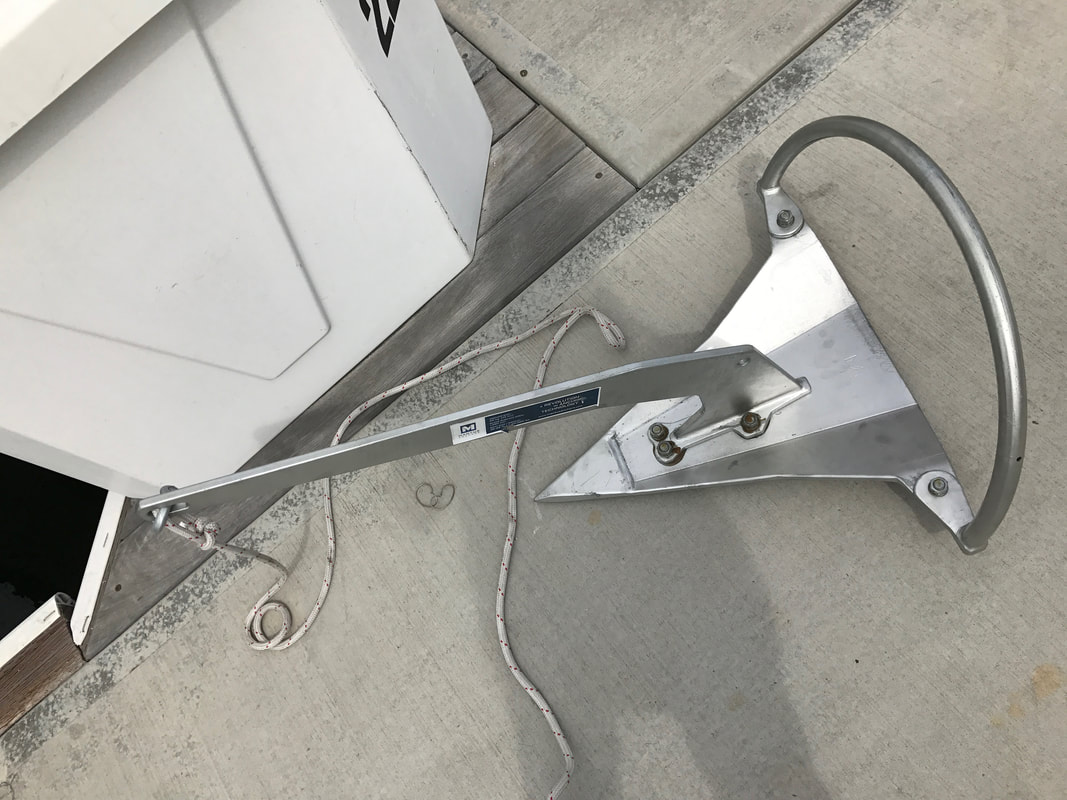 This Mantus, about $400, has a curved bar over the top of it, which is supposed to help right the anchor if it gets flipped over. It also has a really long arm, one so long that the anchor wasn't sitting right on the bow roller right. If it was nested on the bow roller, it reached so far into the boat that we couldn't close the anchor lazarette and the curved bar was resting on the stainless rail. Ugh.
Luckily, the Captain had a plan. He decided to modify the current bow roller so that it was positioned further out on the stainless bracket. We got a special drill bit for metal, he threw on protective eyewear, and a few minutes later, we had it rigged.
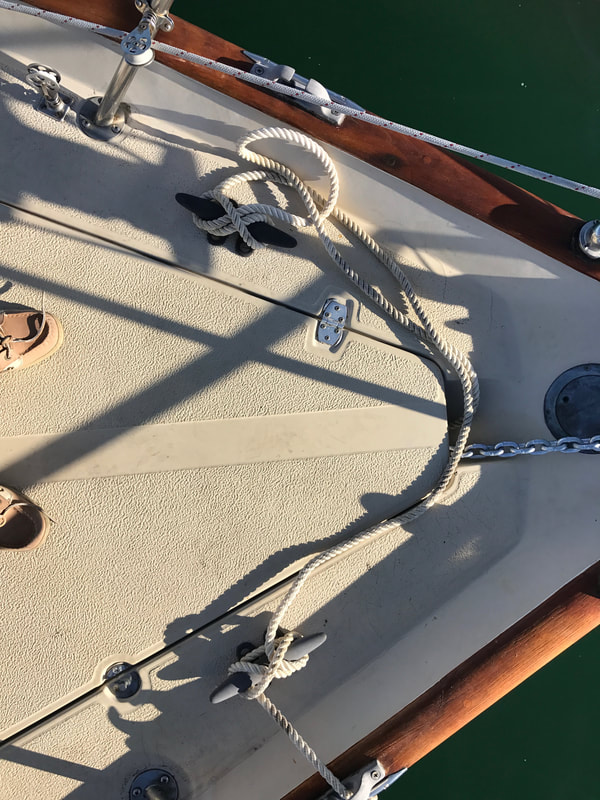
Of course now that we had an anchor we had to try it out. We sailed over to an anchorage by Island White to play with dropping the hook. The captain was at the helm looking for a good depth and getting the boat pointed into the wind, and I was on the bow ready to deploy the hook. This was the last major sailing thing we had to do to feel like real sailors, and yes, we were freaking nervous. 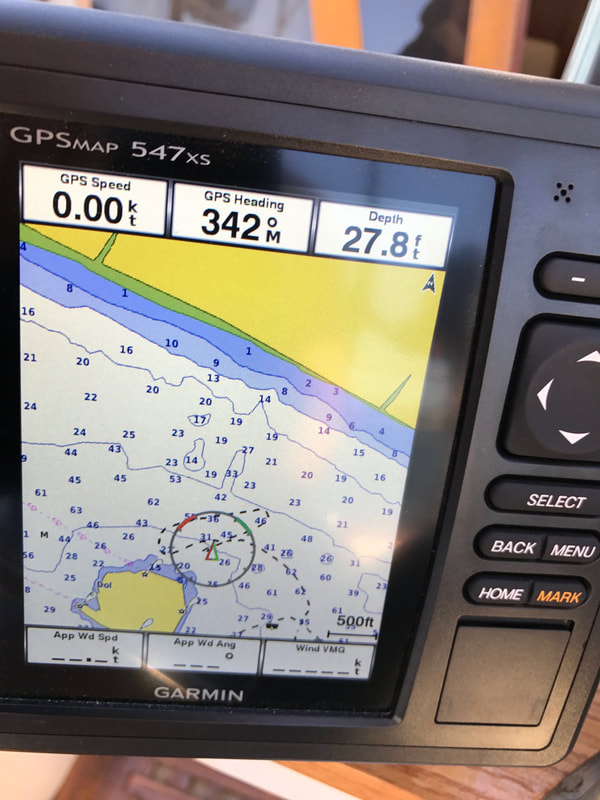 Turns out dropping an anchor is pretty easy. It didn't go at all as planned, but it was kind of impossible to screw it up. He gave the order to drop the hook, I loosened the windlass, the anchor started to fall. The first and only hiccup came when the curved part of the anchor rested on the stainless rail. I put out a little slack, tightened the windlass, lifted the anchor off the rail and got it over the water, and loosened the windlass again. Gravity did the rest. When we had 60 feet of chain out, I tightened the windlass and Captain threw Kenutu in reverse to "back down" on the anchor. They say this is how you "set" the anchor, or get it to grind into the sea bed so it holds you there. Kenutu's reverse is funny, more like a backlash crab walk turn move, but the boat stopped moving eventually even when we revved the engine to 2000 RPMs. We tied a snubber to the anchor chain to take the tension off the windlass and then tied that snubber line to one cleat and to another cleat. We weren't scared of losing $400 in the ocean at all.
We stayed anchored for about an hour, watching some people do a photo shoot on another sailboat and soaking up some sun. Mack had a beer. Life was amazing. And then we had to haul the anchor. We have a manual windlass. I gave my right arm a little pep talk, the Captain got on the helm, and I started cranking. I watched the colors go by, and then at about the 30 foot mark, it got really hard to crank the windlass. I gave it a few more cranks and felt a pop, like when you pull your shoe out of the mud. After that the cranking got easier and a minute later, the hook surfaced. I helped it over the stainless rail and into position, tied it down, and told the Captain "the hook is in the pocket." I also learn stuff from watching Below Deck.  We can officially check "anchor" off our to-do list. Now we have "practice anchoring" on there. As well as "set a stern anchor" and "dive on anchor" and "anchor overnight." Oh god.
1 Comment
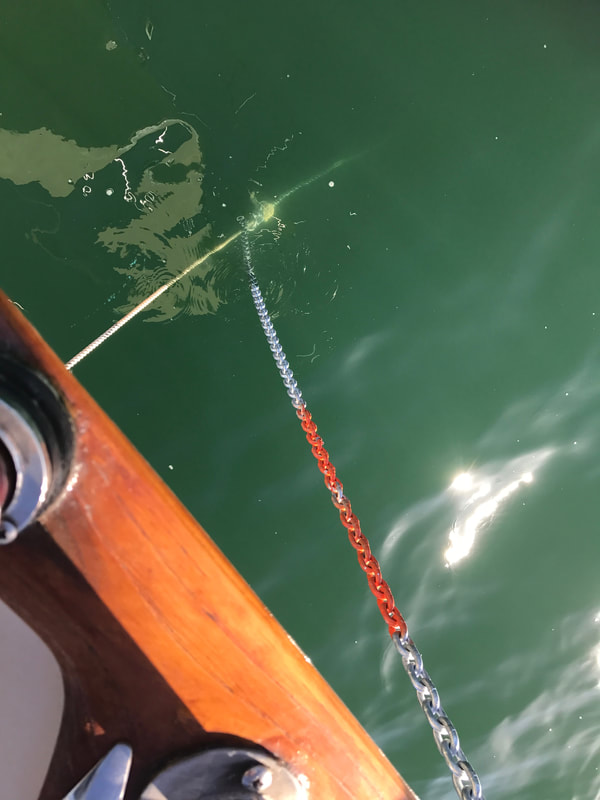
Rub your body with oil. Sounds like something a dominatrix would say, right? Well, it's really sailor speak to know how much scope, aka length of chain or rope attached to your anchor, you have out. Mack decided we were going to have 200 feet of chain attached to our massive anchor because he really does not want to drag on the hook. I feel like that's an inevitable panic that we'll have but if we throw 1000 pounds into the water to hold us still, I'm game. Run your body with oil is a sentence you're supposed to remember so you can remember the order of the colors and thus know then length of chain or rope you have out. Rub is red, your is yellow, body is blue, with is white, and oil is orange. I always end up saying Put oil on your body! or Rub oil on your body! or some other derelict version of the sentence before Mack rolls his eyes and says the real sentence. 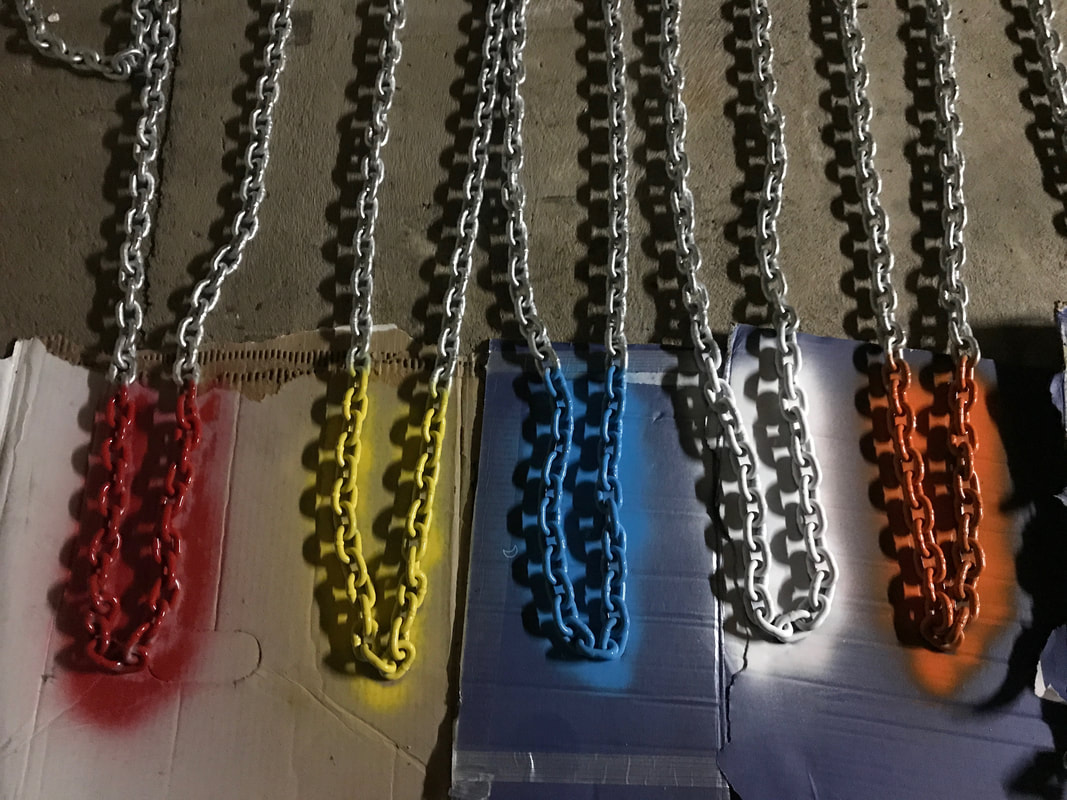 I don't know how much chain everyone else puts between colors, but we decided 20 feet would be good. That's easy math -- 20-40-60-80-100 -- and it seems like it'll be a good amount for the depths we think we'll be anchoring in. Kenutu has a 6-foot draft, which means ideally we'd anchor in 20-30 feet of water in a protected area and put out 4:1 scope. Gah, more math, but basically you put out 4 feet of chain for one feet of depth so you can spin around in a circle and have some wiggle room. That'd be about 120 feet of chain. Using the Rub Your Body With Oil method, that'd mean I'd watch for all the colors to go by and stop after red goes out a second time. After our 14-second chat to decide on 20 foot increments, we measured out ten feet and laid the chain out in the garage. I decided to do a short section of color at the 10 foot increments so we had it if we needed it. Basically, the side on the left in the pic below is every 20 feet in RYBWO and the side on the right is the midsections of those bigger sections. 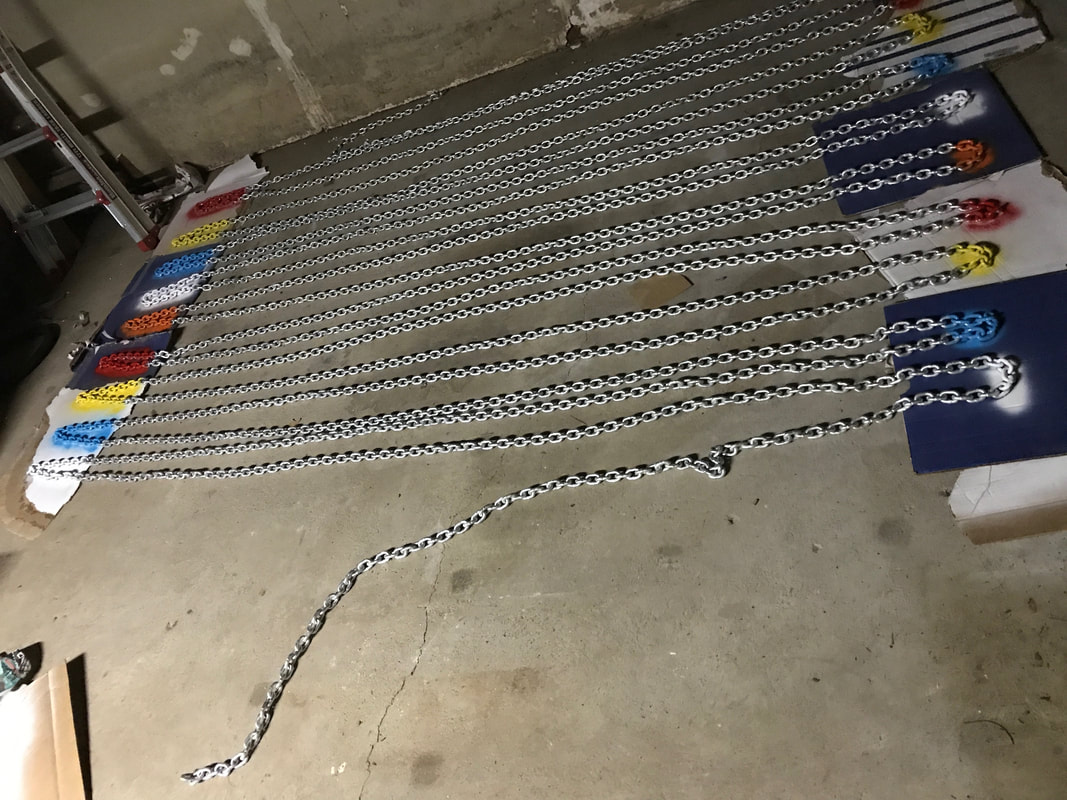 Ultimately the plan is to attach the chain to more rope so we have more scope if we need it and to put something on the end of the whole thing so that it can't all come out of the anchor locker and fall to the bottom of the ocean. See, we're planners.
Life is precious. And fast. We spend a lot of time working on Kenutu, but we also spend quality time just enjoying her. This week she righted the world for me and my cousin Shannon. We lost our cousin Trina unexpectedly, but an afternoon on Kenutu showed us the beauty in the world persists and there are lots of joys to be shared still.   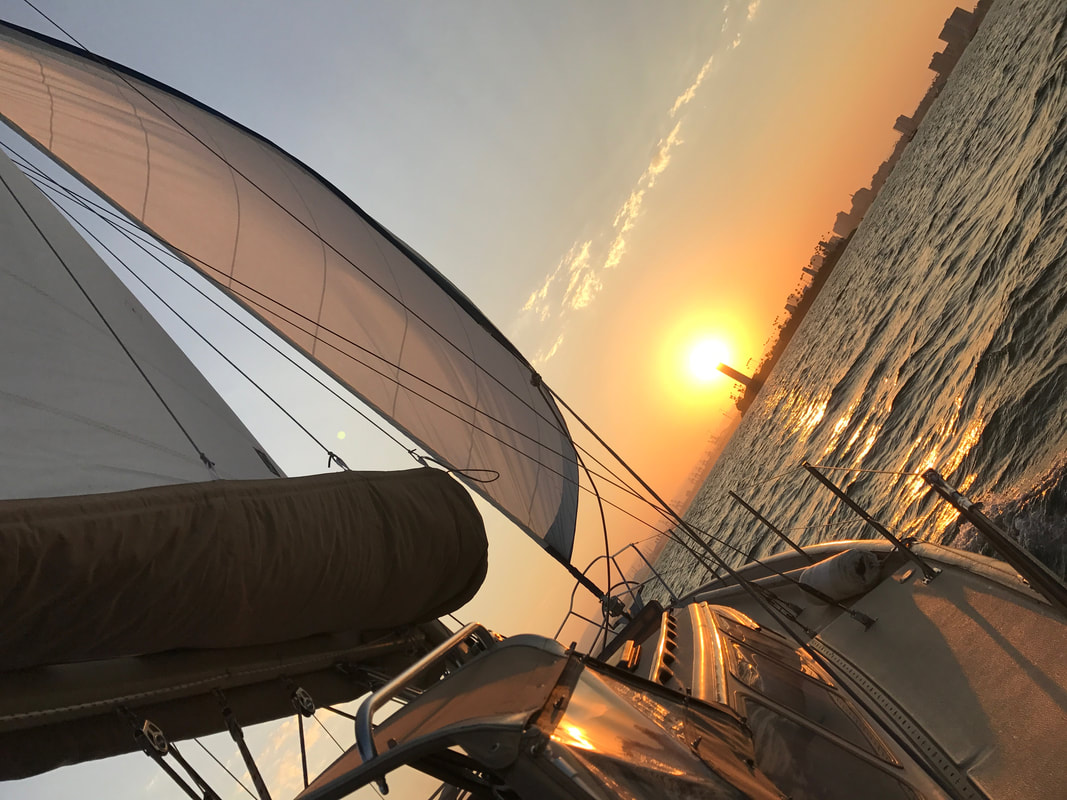 Communication is key to any relationship. Especially when that relationship can hit the rocks, take on water, and leave you adrift in the middle of the ocean. Alas, the Captain got some new radios. We got a couple of rechargeable portable radios made by Cobra so we can communicate from bow to stern when we're doing things like dropping anchor or coming into port. They have a clip but they also float are white and orange, which if they fall in the water, we may actually be able to see them. We got them on Amazon for like $45 each. We also updated our main radio in the nav station (aka desk where the charts and stuff go). For this one we got a Standard Horizon, which is pretty full of features for being only $30 more than the portable radios. 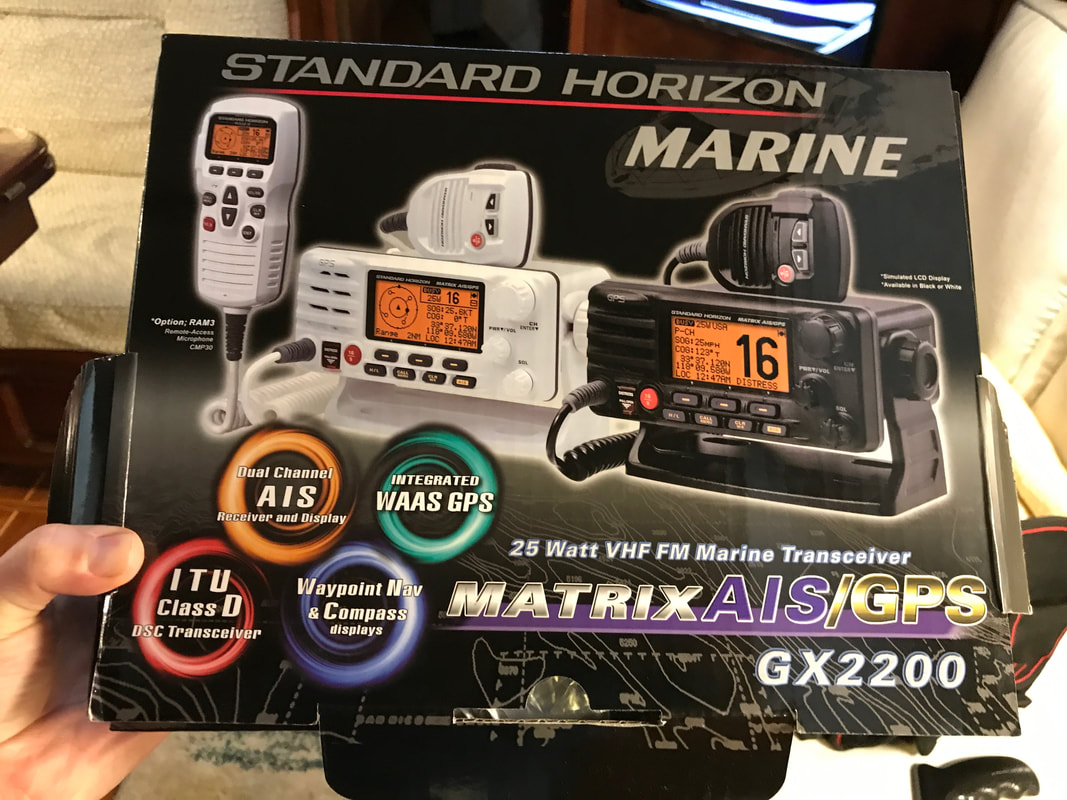 In addition to its AIS features and waypoint features, it also has a distress button and a built in fog horn that'll blow every few minutes when it's foggy out. Which means you don't have to do that but you still have to go crazy from fog horns blowing. 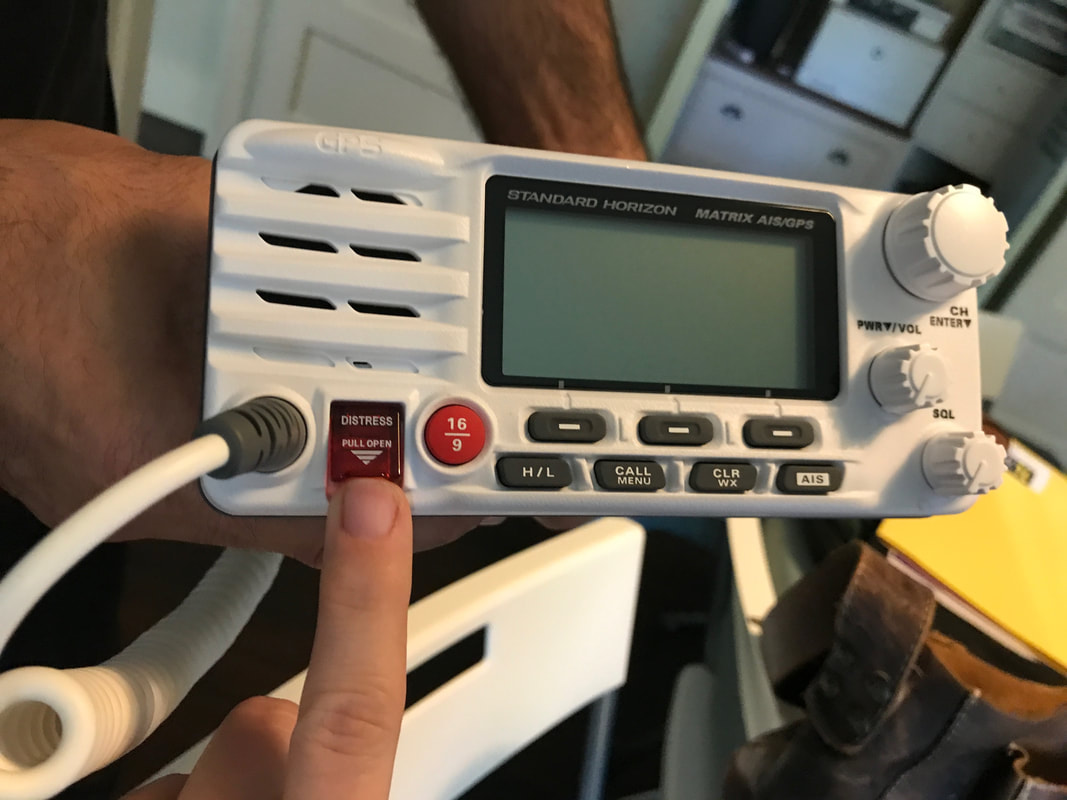 The new radio fit perfectly in the old radio's spot in the nav station. You know, a small miracle, no big deal. Mack pulled the old one out, popped the new one in, and just like that we were ready for some chit chat. Now if we ever start to sink, we can push DISTRESS and have our GPS location right in our faces as we give a panicked message disguised as gentle concern. 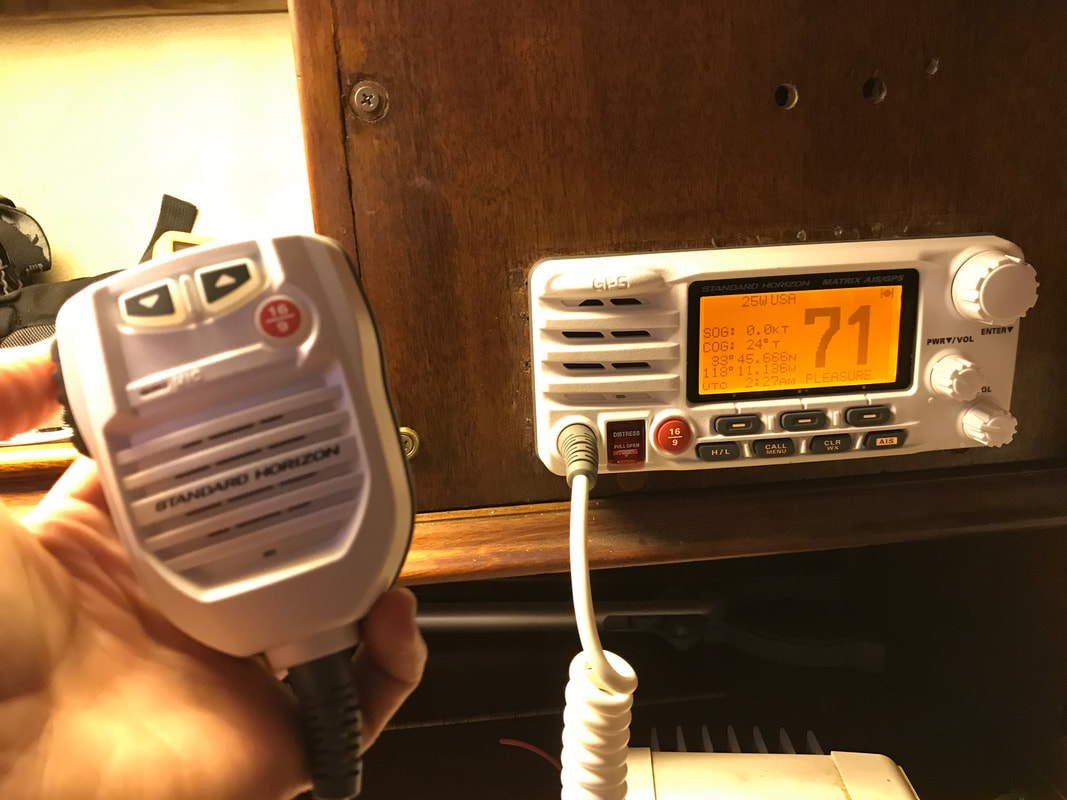 To get Kenutu's motor running, you have to bend over. She's kinky like that. Also, her gauges and ignition switch are in the cockpit wall near the floor. The captain does not take kindly to bowing, so he decided he was going to rig all the gauges and the ignition switch to an electronic box on the binnacle. We saw this set up on another Islander when we were in Holiday Harbor and were insanely jealous. The first step was templating out the base, which had to sit on top of the existing shelving thing and wrap arrow. Thank god for cardboard, am I right? 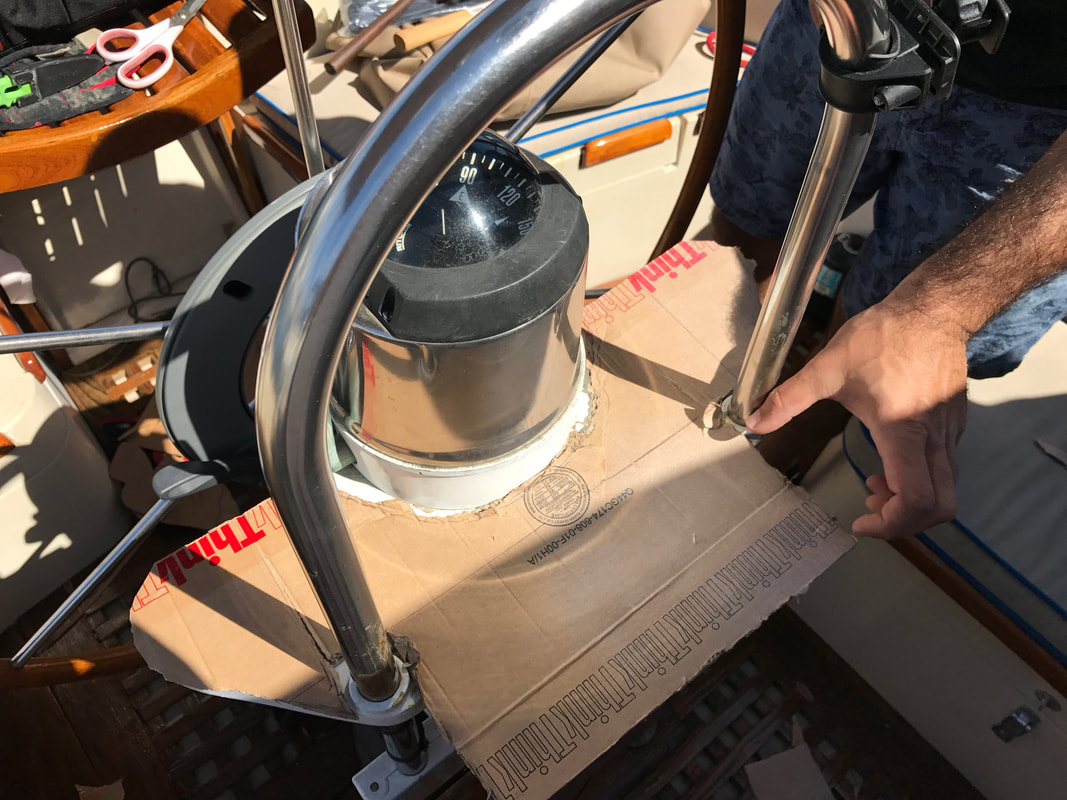 Next up was getting the jig saw and some wood and seeing just how talented we are with sharp power tools. The template gave us the rough shape, Mack bought some very expensive oak, and then we sanded and trimmed until we got a perfect fit. I say we, I mean he. Then Mack threw on some varnish and taaaa daaaaa! 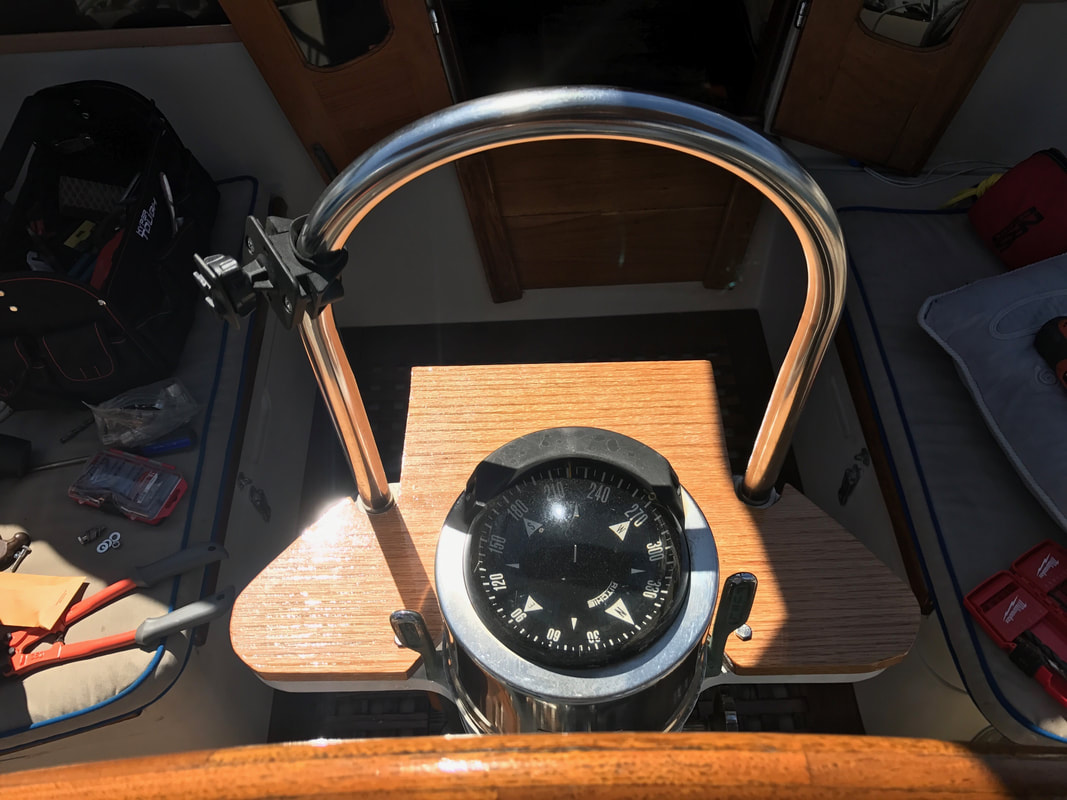 When we got Kenutu she didn't have any electronics. No depth finder, no chart plotter, nothing. Now that she had a pedestal it was time to fix that. Plus, Mack loves electronics. 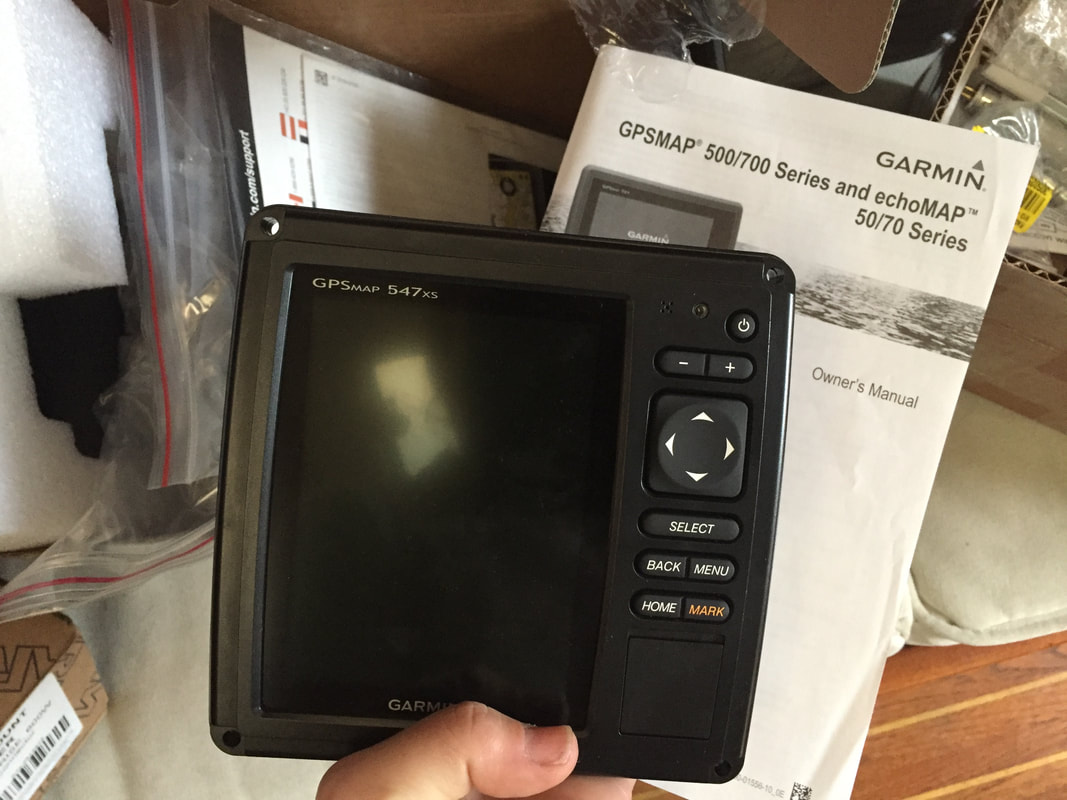 We opted for the Garmin 547XS, mostly because it was one of the few models out there that's compatible with our autopilot. Mack found it on sale for $350. It's small enough to fit on the pedestal perfectly without interfering with the gas, and it spins so if you're sitting on the side instead of at the helm you can watch where you're going. 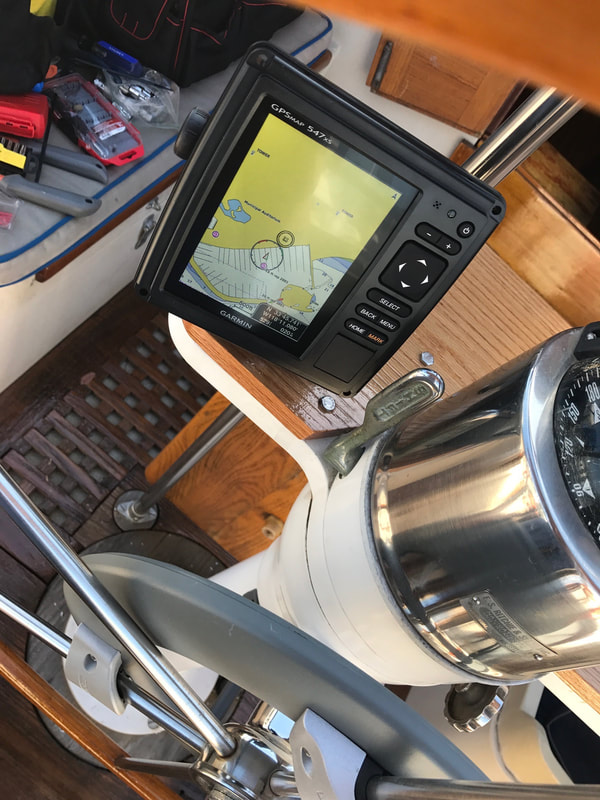 Things were progressing so nicely Mack moved into making the box that would sit on the pedestal and house the gauges. The end result was a piece of shit that we later lovingly referred to as the prototype. 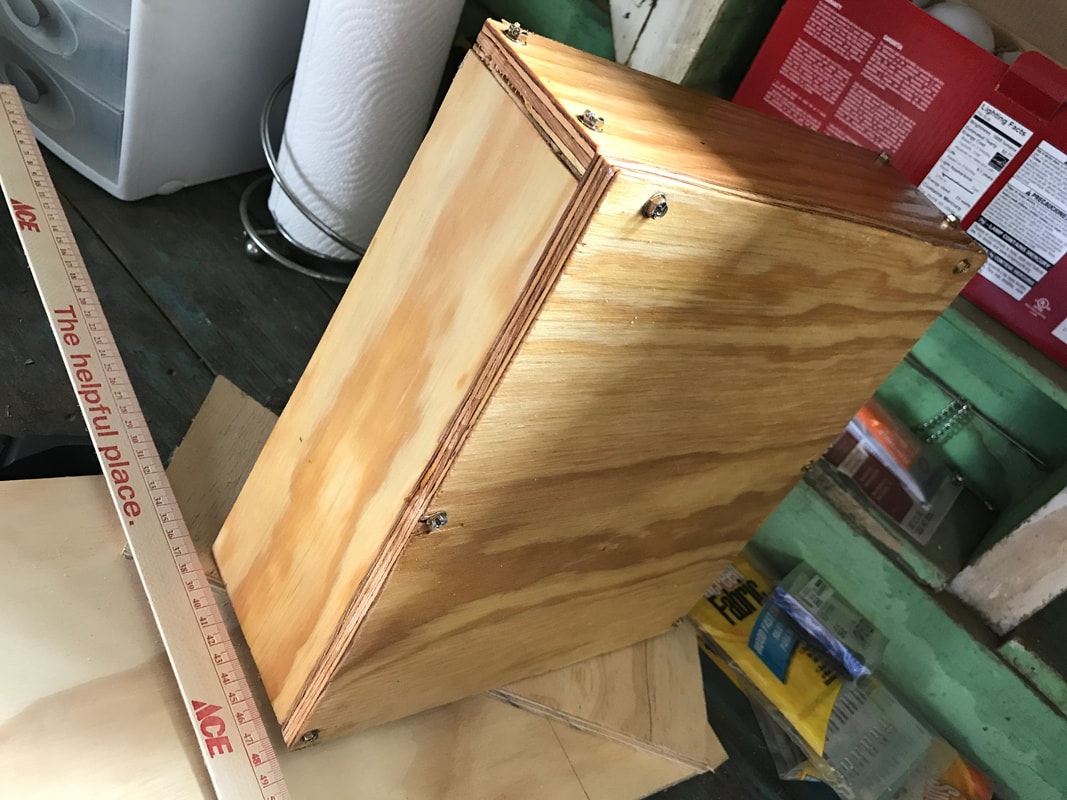 Luckily Scott came for a visit and, in between Screwdrivers, he helped Mack craft a beautiful box. He pointed out that we don't want the box to leak so we should make the top hang over a smidge. He introduced us to fancy pants woodworking tools, like clamps and saws and drill bits to recede screw heads. We got some triangle metal thing to make out angles right. For someone who was always drinking while doing this project, I gotta say, Scott was meticulous. 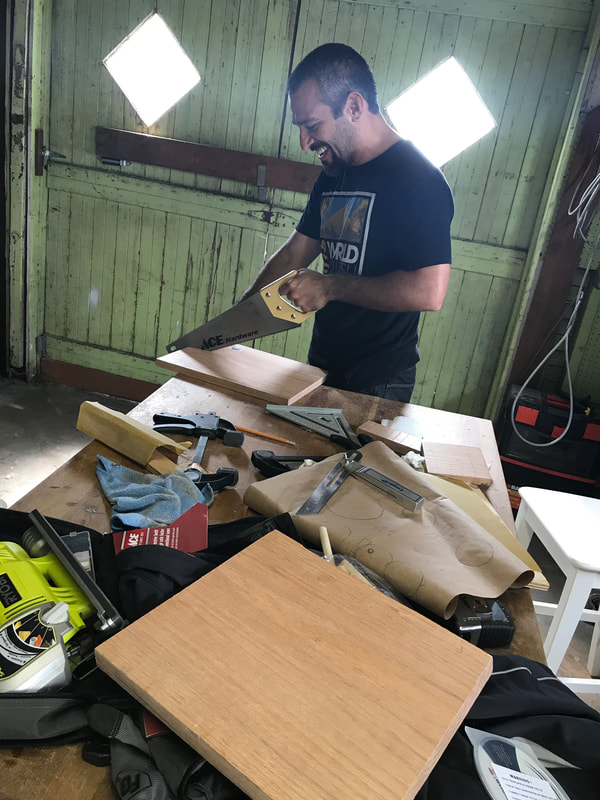 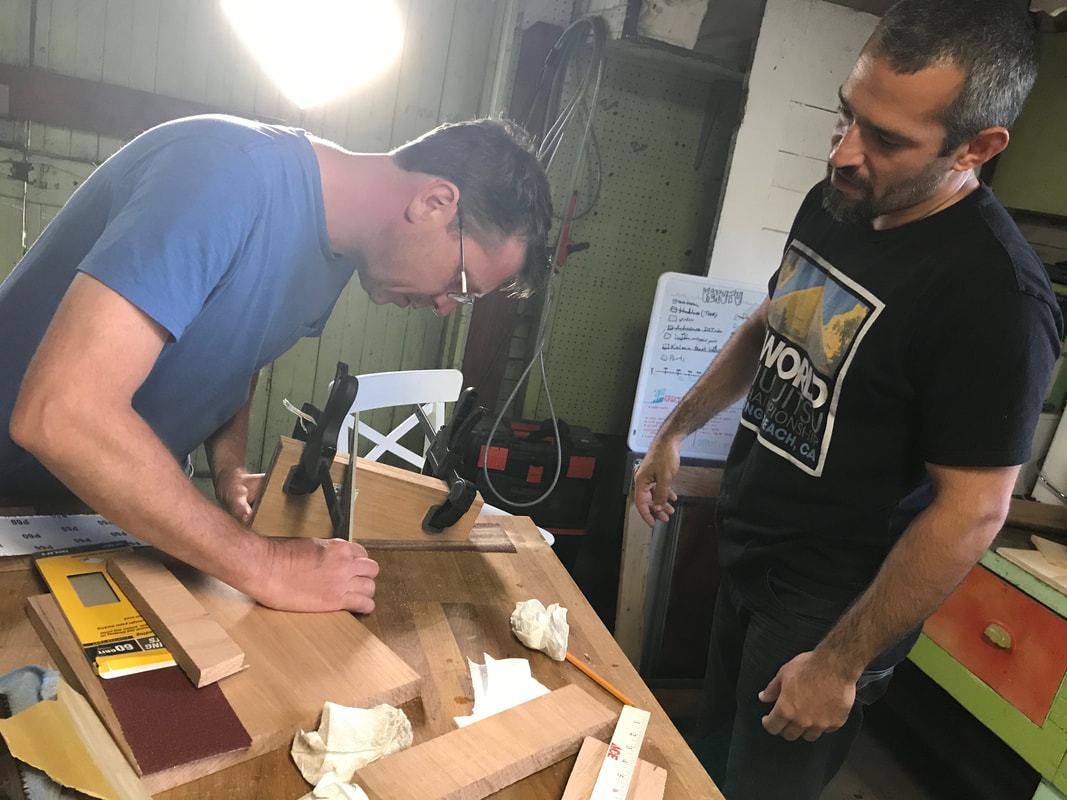 After the sides, back, and top were cut out and perfectly aligned, it was time to do the face. This meant planning out where you wanted each gauge and then cutting a circle with another new tool that would make a hole for the gauges. Mack also planned to place an ignition switch on the panel, which meant the helmsman would no longer have to bend over... until it was time to kill the engine. 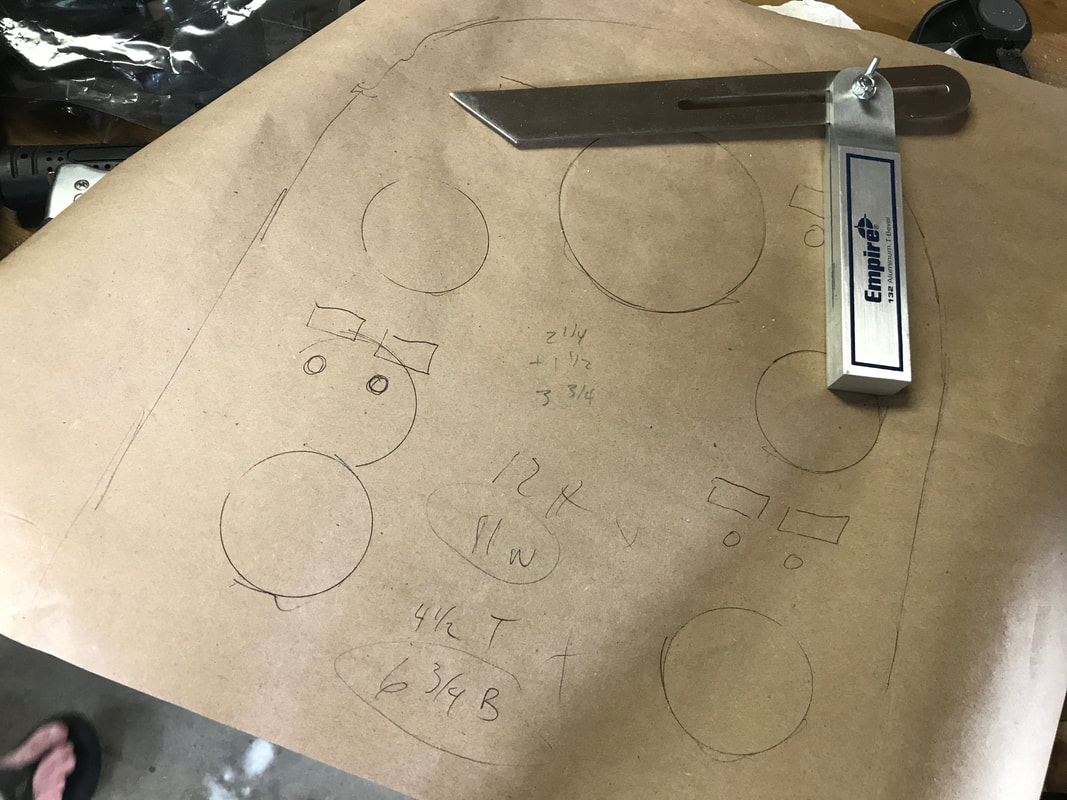 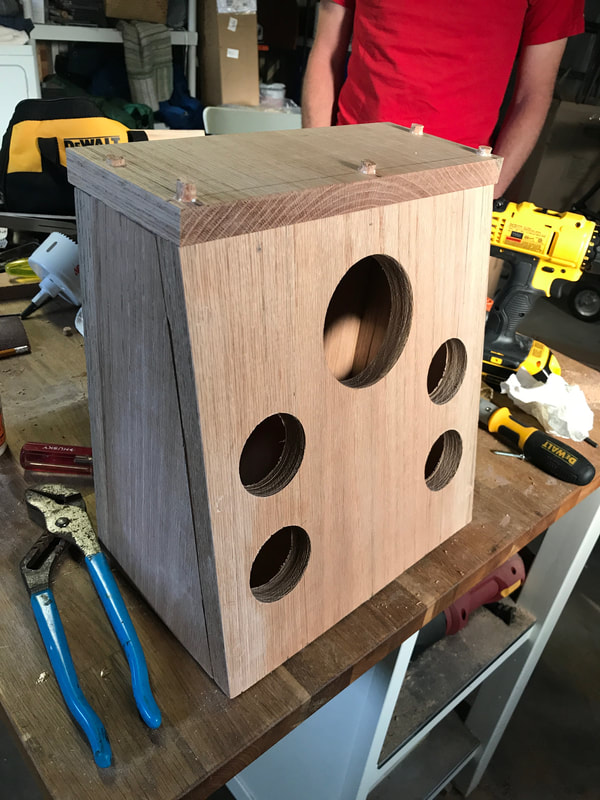 Part of what made the prototype so crappy was all the exposed, sticking out hardware. Scott taught Mack about this skinny bendy saw and this fancy drill but that would cut out dowels out of your wood. So they made dowels, placed them in (some of them even matching up seamlessly with the grain of the wood), trimmed them off and voila. Amazing. Mack mounted the box to the pedestal base he'd made and left the screws on the back exposed so that he could wire everything in and access the wires as needed. Then, one day while I was at work, I got this. 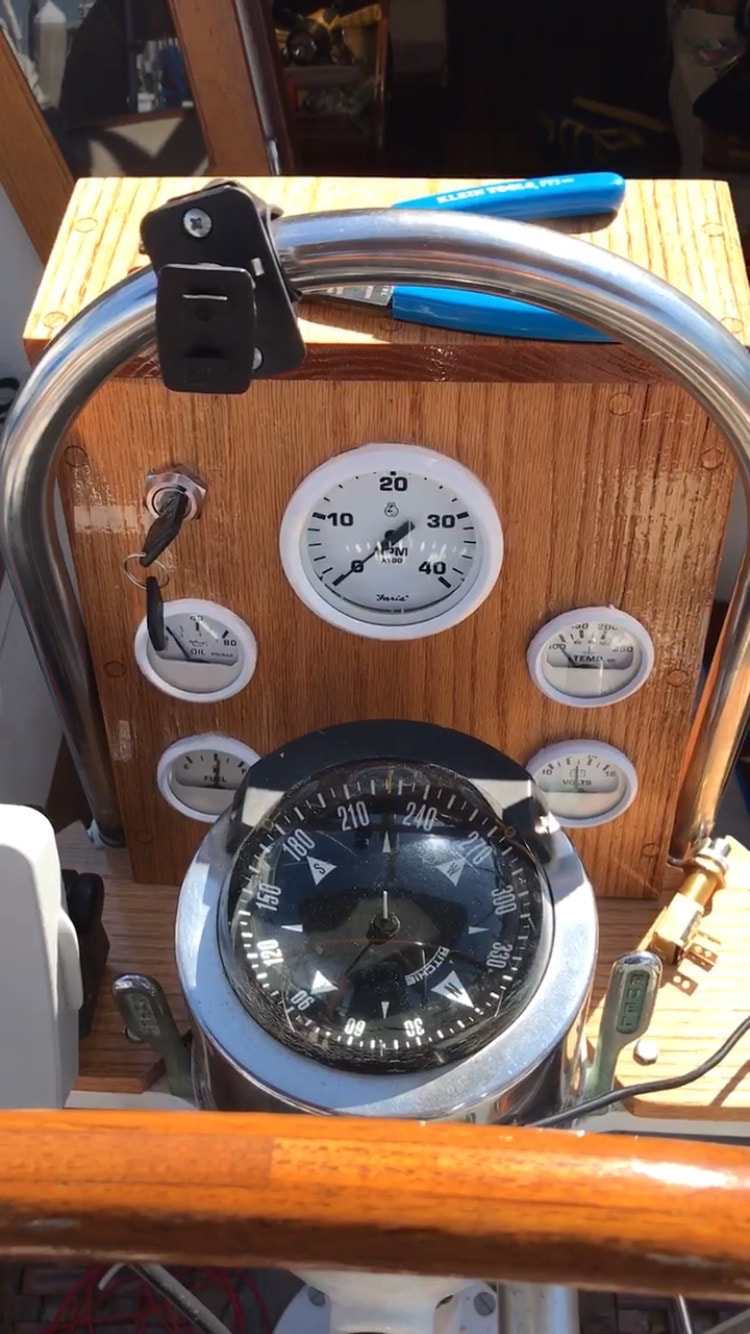 Mack had fed the wires up the support pole and connected everything. He even sent me a video of him turning the key and starting the boat! You could almost feel the jealousy lift!
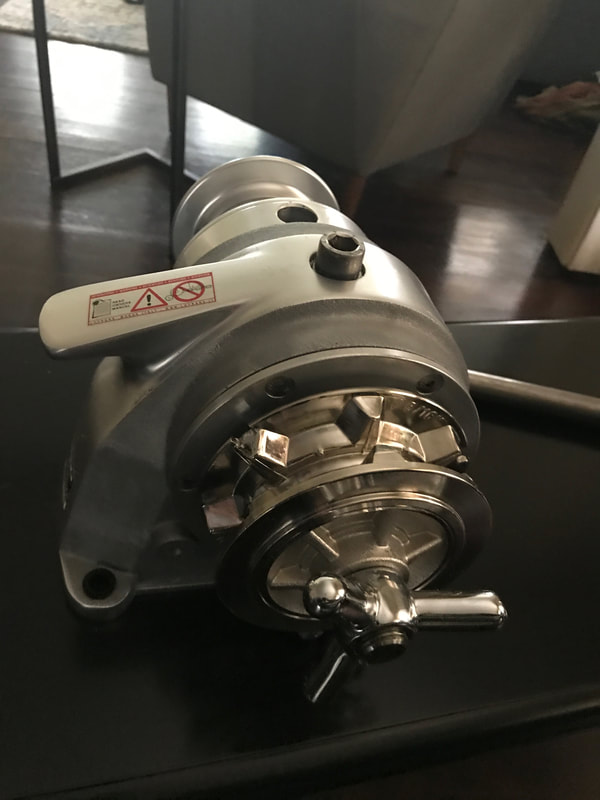
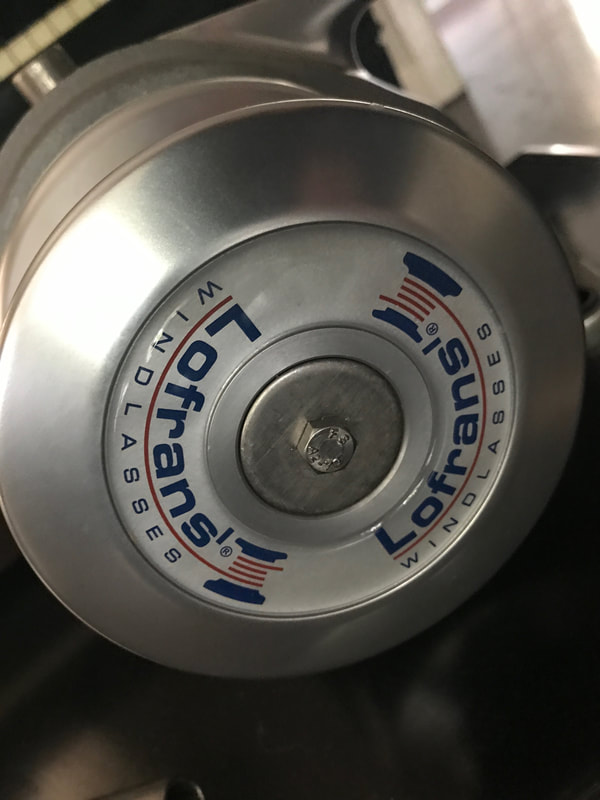
Before moving the gauges to the pedestal there was a bunch of wiring running across the starboard lazarette (aka under seat storage), which we were always worried we were going to break when we pulled out life jackets or other crap from that abyss. Mack cleaned all that old wiring out and now we can go crazy pulling stuff out of there! Once the box was all rigged, Mack relocated the auto pilot to the pedestal as well. And now, you feel like the captain of an electronics supership when you sit at the helm. I gotta say, having the ignition and gauges right at eye level is awesome. We have to be a little strategic with our hand holds now, since the electronic box obscures the grab bar on the sides of the pedestal. And we lost our cup storage that used to sit on the back side of the grab bar. But all in all, the box is a major improvement. Ladies and gentlemen, we have a new windlass. The chain we bought didn't fit the gypsy on the old windlass right, so it was slipping. When you pulled back, it pulled back. But when you went forward, it also went forward. Which means no progress. As the Captain went to remove it so he could inspect the gears, the bottom gasket ruptured, pouring hydraulic fluid out into the anchor locker and all over the deck and the dock. The moral of the story is old and sturdy is still old. I just asked the Captain what was so great about the new windlass he picked, a Lofran's windlass, and his words: "It looked sexy as hell."
hasA little more probing and he was able to itemize other features. He has a thing for manual things over electric because he claims they are more reliable but really because he sits in the cockpit while others haul the anchor. The Lofran's Royal is made from marine aluminum and is so much lighter than the old SeaTiger was. It's also filled up with oil and sealed, meaning no maintenance. Most importantly, though, it had a low enough profile to fit in the damn anchor locker. 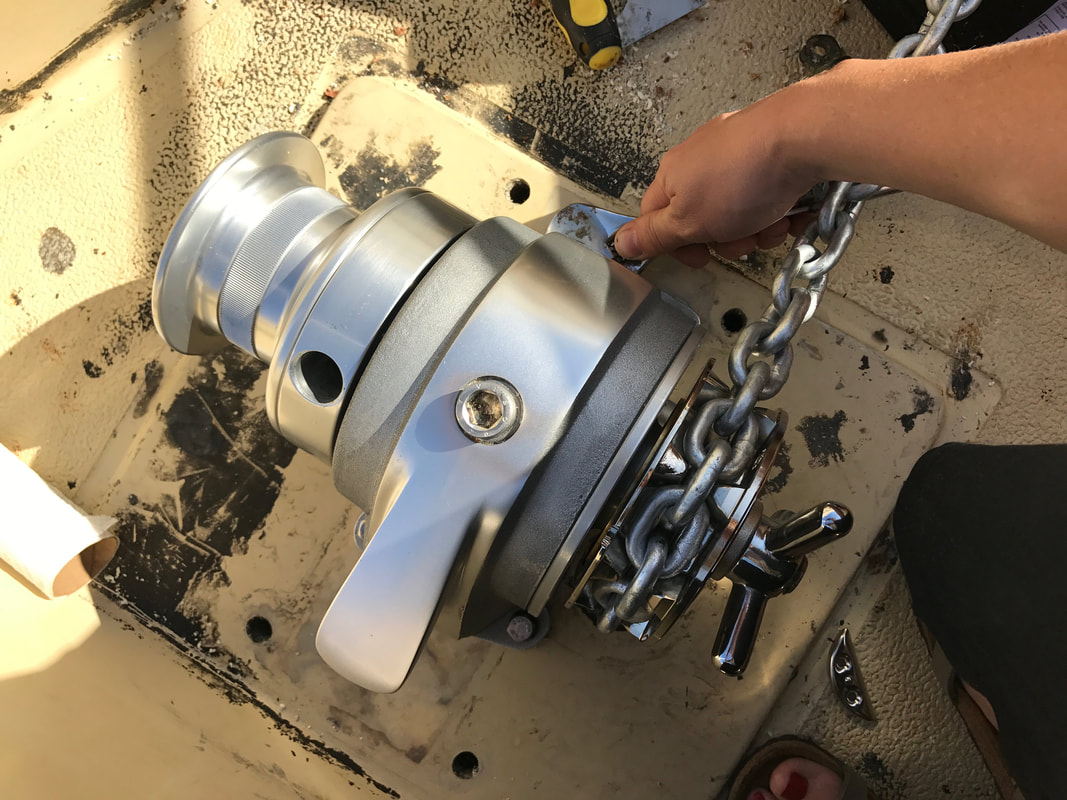 Install was pretty easy. We had to drill a few new holes and patch the old ones. I cozied up with some anchor chain and held nuts from below while Mack turned bolts, and after learning how to shout at each other through tiny holes, we found a rhythm. Now we have a new windlass in place, the chain isn't slipping anymore, and the extension lever makes it pretty easy to haul.
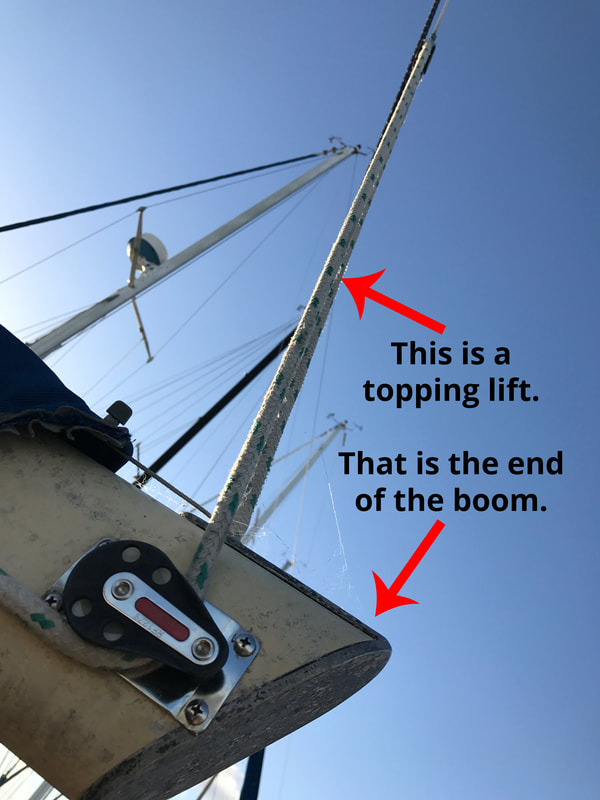
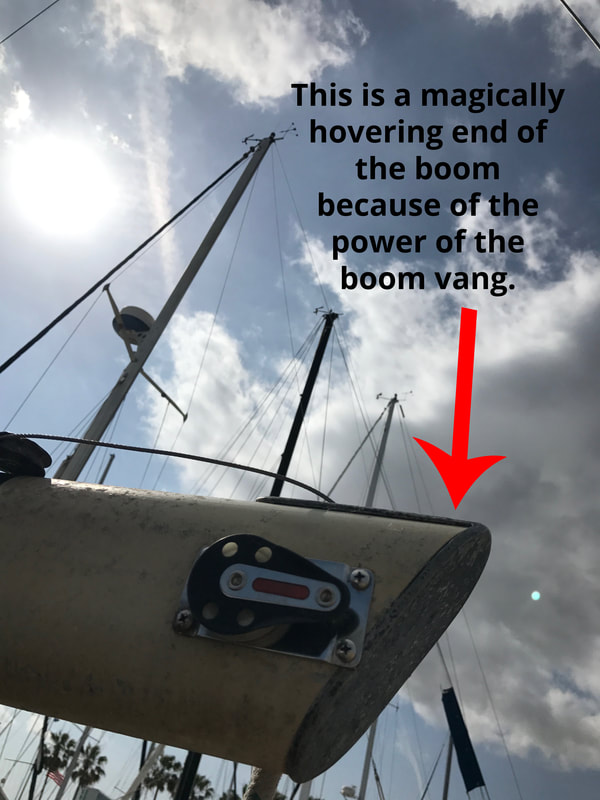
Hopefully this ends the windlass saga because it feels a little like torture at this point. After we got our traveller from Garhauer Marine, the captain got twitchy for a new boom vang. When we moved in next door to a fella named Doug who had an ultra tidy deck with a ultra sturdy boom vang, the captain succumbed. Jealousy is a powerful motivator. We made a sophisticated drawing using wire and some wet, dirty paper and mailed it off. 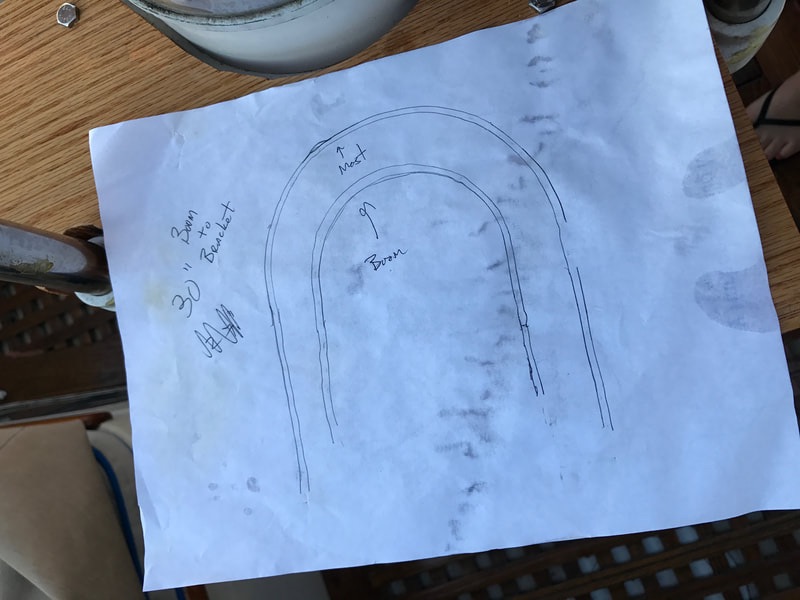 A few weeks later, this came in the mail. 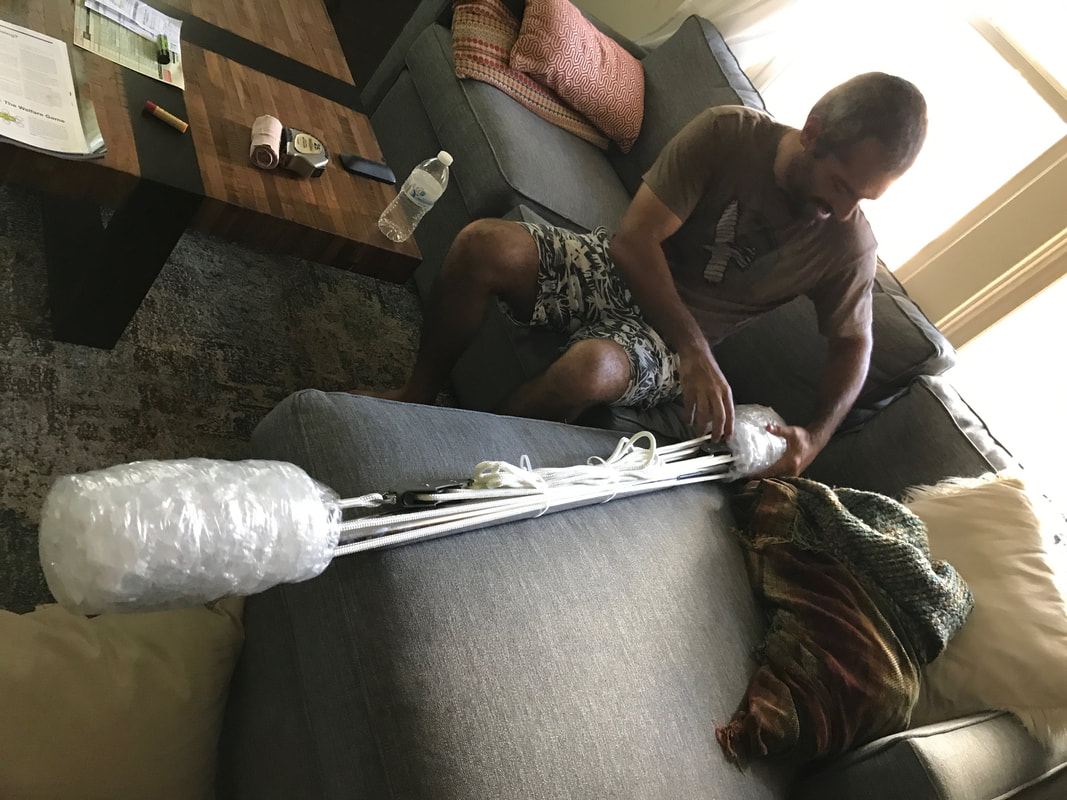 The draw of the boom vang is that it was going to let us get rid of the topping lift and that it would hold the boom up. The boom is that big pole that the bottom of the sail is latched to that swings from side to side when you turn the boat. On Kenutu, the boom was held up by a couple of ropes so that it wouldn't hit people in the head when it swung from side to side and to keep the bottom of the sail level. The boom vang is basically a squishable metal pole that supports the boom from the bottom instead of the top. It has a pulley rig so you can tighten it or loosen it as needed, depending on conditions.
To install the boom vang, we had to drill screw holes using a tap bit. This was uncharted territory for us, but turns out tap bits are an awesome little invention. While Mack drilled the screw holes to the mast and the boom using the mounting plates as templates, I discovered the power of using your long bones as a frame for holding things up forever. 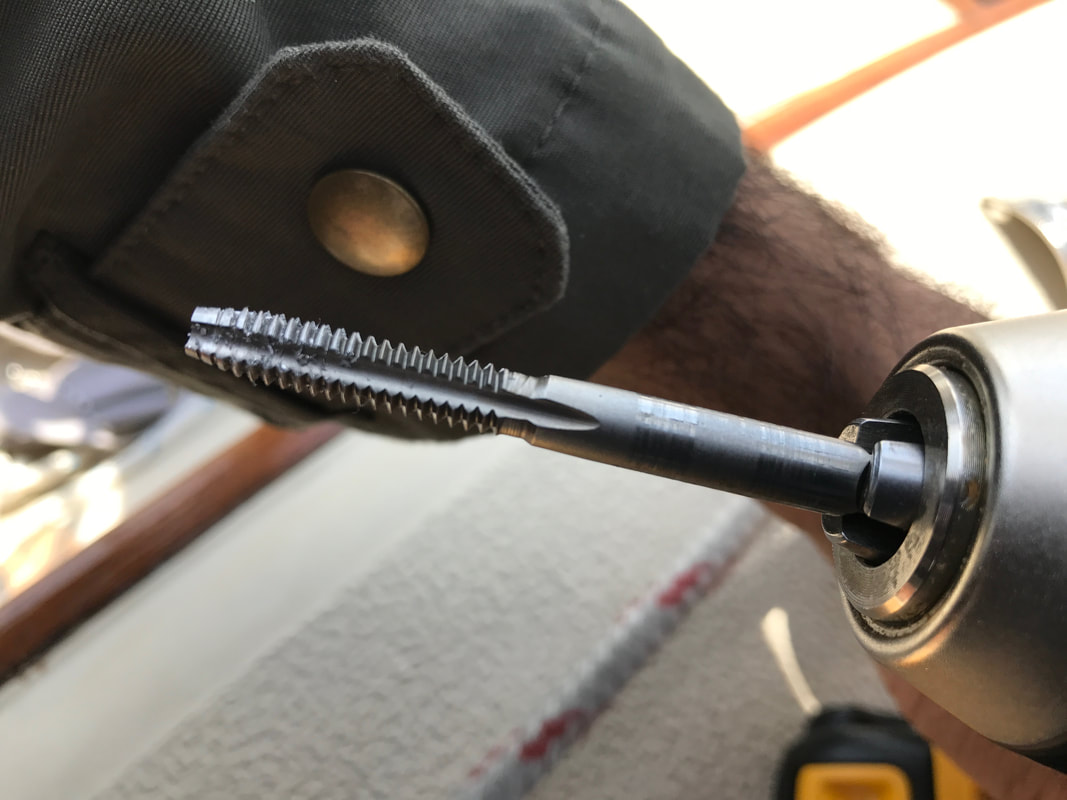 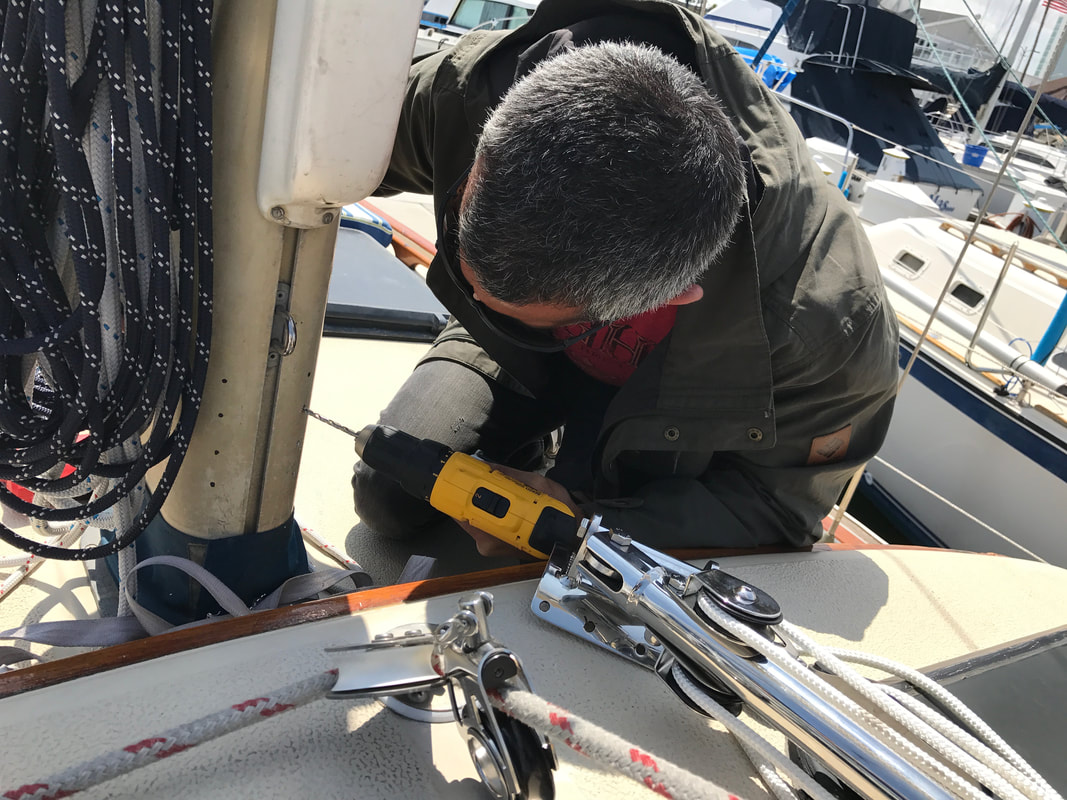 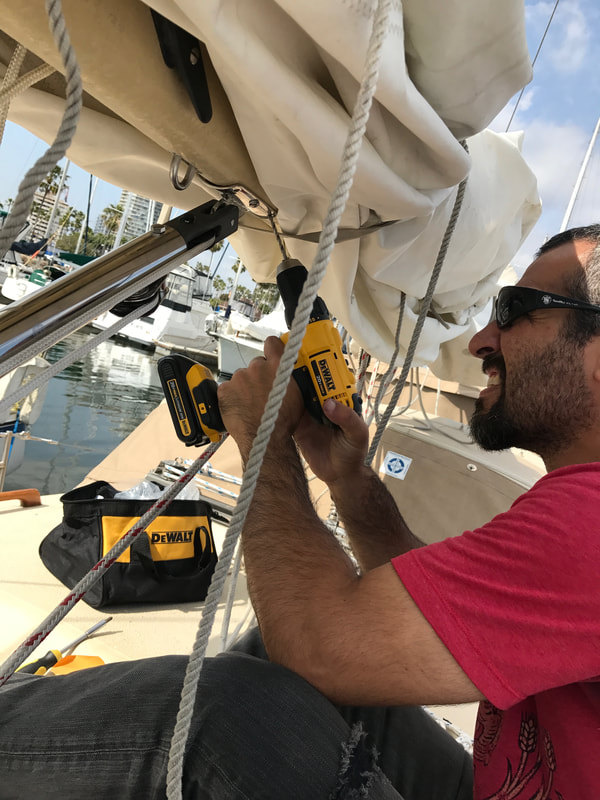 Wear safety glasses because oh the small metal shards! I have a feeling we'll be finding those on deck for a while even after the sweeping and washing down I did. One thing we learned is that the angle that you drill the screw hole with is important if you want everything to line up. Our final holes were a smidge off, but we made it work and didn't have to drill extra holes in the mast. We dipped the screws in anti-corrosion Tef-gel, which we called sour cream, before placing them as an extra measure. 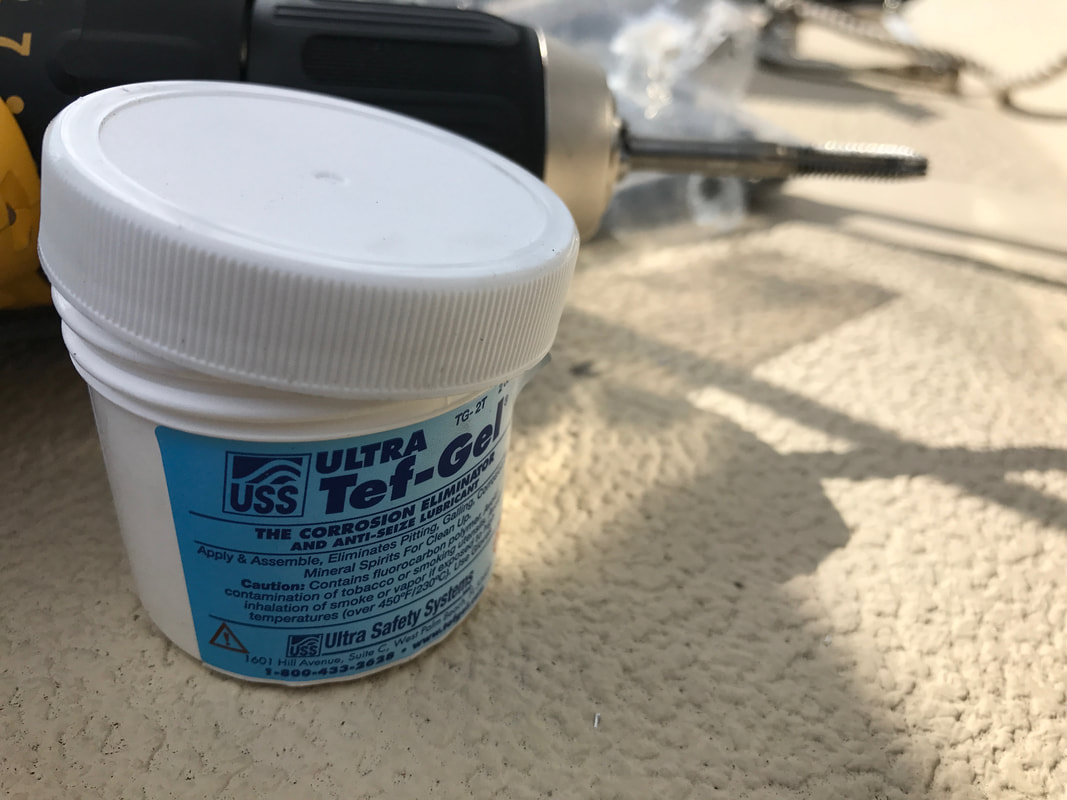 Boat time is like boat money. Everything takes 20 times longer than you expect. Everything except installation of the boom vang. The whole process, from drilling the holes in the mast and the boom to the final product, took less than two hours. I was floored that a) it went so quickly and b) it went so easily. We didn't even have to recharge the drill! 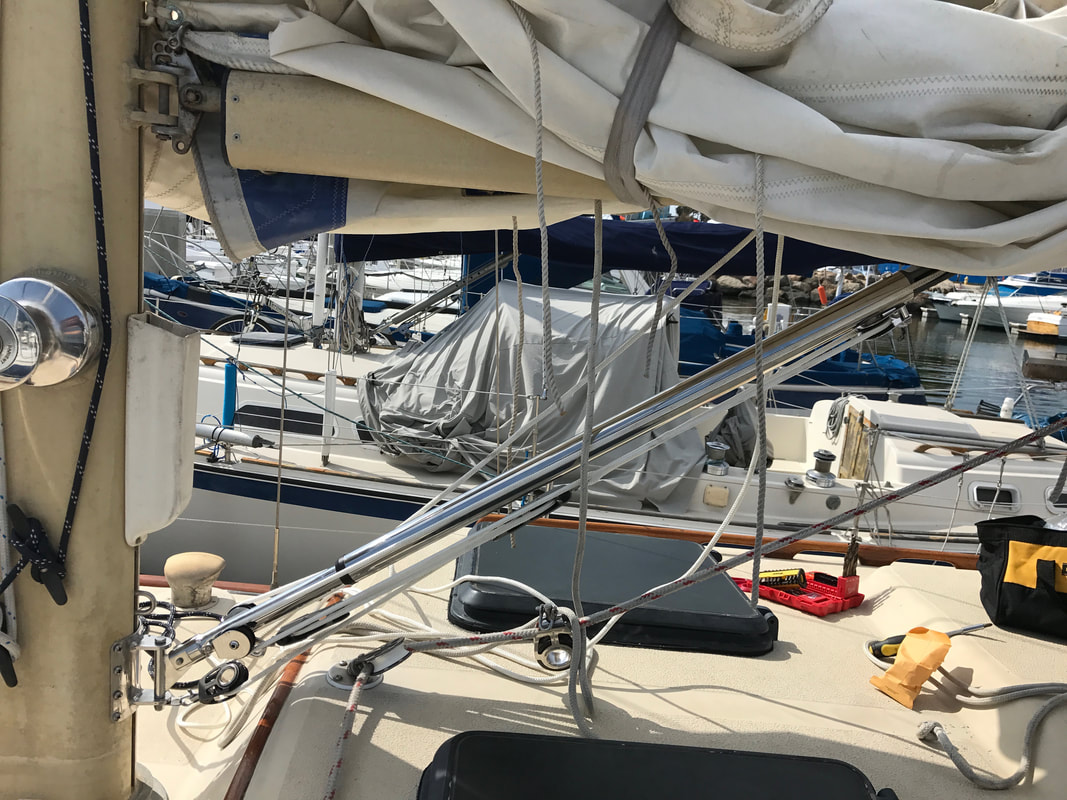 Take that, Doug.
Last summer a rock climber friend gave us some Dyneema, a type of rope that is touted as being as strong as steel. Since rock climbers put their lives on their lines, we figured the stuff must really be strong and reliable. We started using it on deck to secure the paddle board and various other tasks and were impressed at the little rope's power. Our main sheet, a combo line of steel cable and rope, was pretty stretched out... so stretched out that when we raised the main sail, the cable ended up on the wench, making a taut sail nearly impossible. After only like two months of whining, Mack finally listened and agreed to upgrade the lines. Hello Dyneema. He ordered 10mm lines, and the company even whipped in an eye splice as a bonus. Mack had spliced rope before and is really good at it, but getting the lines in a ready condition was pretty awesome. One less thing on the list! 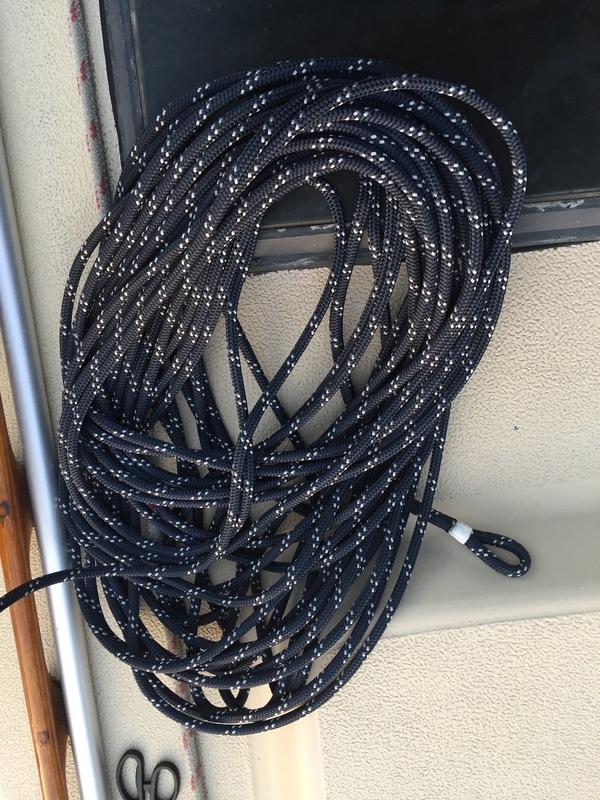 Now for the fingers-crossed work of swapping the new line for the old. Mack engineered a bridge between the new line and the old cable using duct tape and small piece of smaller diameter Dyneema. The plan was to pull the new line into position on the tail of the other line. What could possibly go wrong when there's a block at the top and the rope goes into the mast for about a million feet. NOTHING WENT WRONG. I still can't believe it. Mack held his breath as we pulled the bridge bit over the block at the top of the mast. It seemed like we might have a problem getting it thru that part, but with a little extra tug, it hopped over the speed bump and we were home free. We even swapped out the shackle on the end because why not? 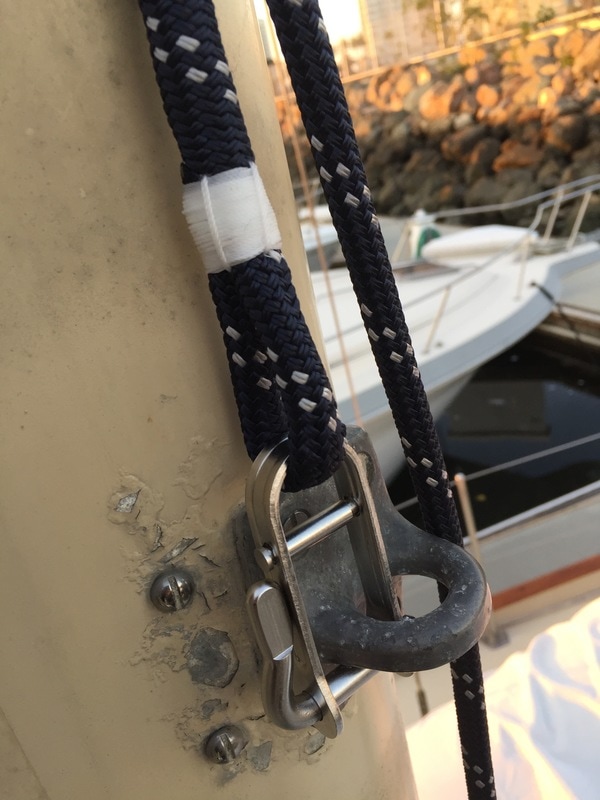 Let's cut to the chase. We wanted to try emptying the holding tank at the pump out station. And we are morons so we decided to do it on a day when the wind was ridiculous and made coming up alongside the dock pretty much impossible. I'll spare you the grisly details and the name calling, but know that at one point, Mack was at the helm, I was on the dock, Kenutu's ass was tied off to the pump out dock, and her nose was as far from the dock as a nose can be. Mack wanted to untie and try again, I wanted to solve it. Another couple who are also boaters heard what must be a familiar tone and came to help. We used lines to pull her in and got her nose tied off too. We then cleat hopped her forward to the pump-out station. And after all that shitty-ness, it was time to handle the literal shit. I put on gloves, which make me feel empowered to touch anything. If I were a superhero, I'd skip the cape and go right for the gloves. Mack took a post at the pump-out station controls and let me do the dirty work. 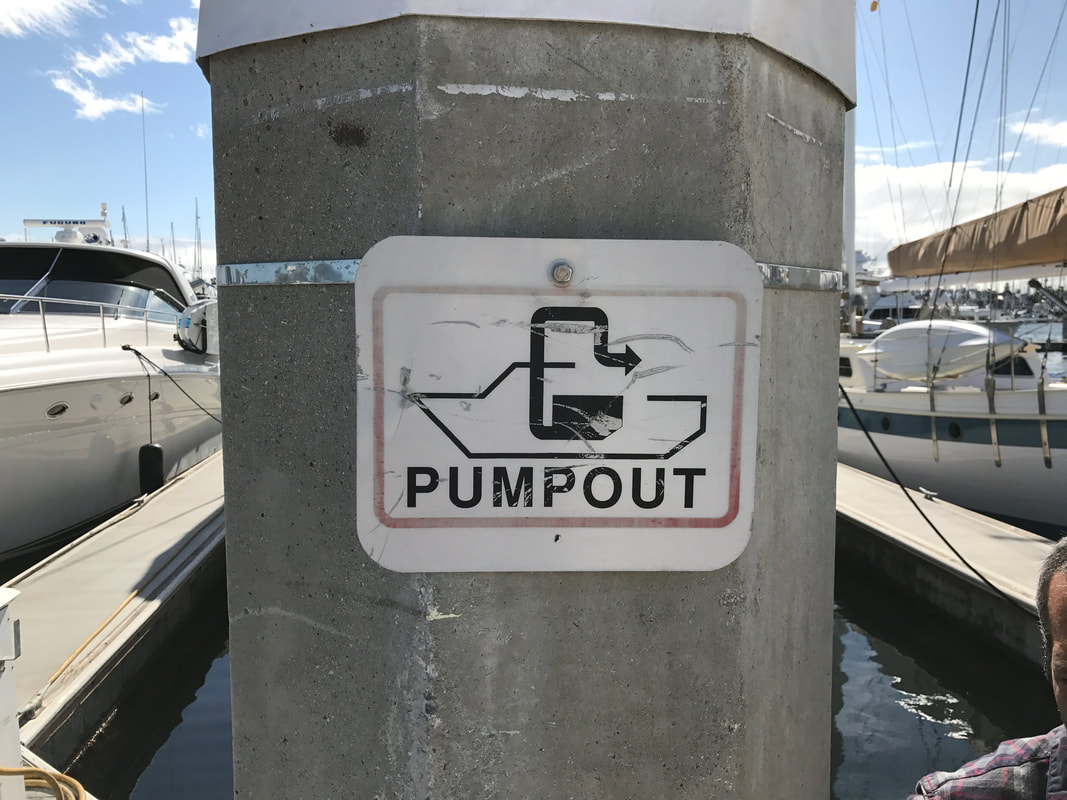 We were pump out virgins before this experience, so if you don't care how it works or don't like hearing about shit and pee, you probably want to move on. The pump out looks like a big gas station nozzle, but instead of pumping gas into a tank, it has a rubber cap that seals over the mouth of the holding tank when suction is turned on. The tube from the nozzle is mostly opaque, but there is a short section that is translucent. This lets you see all the turds and pee coming from the box that lives under your bed. This is not where sweet dreams come from. After you suck all/most of the gross bits out, you use the water hose that's by the pump out station to put some clean water into the holding tank, thereby giving it a flush or a rinse. Then, you repeat the poop/pee sucking process and suck out the water. You are wearing gloves, you've got this. 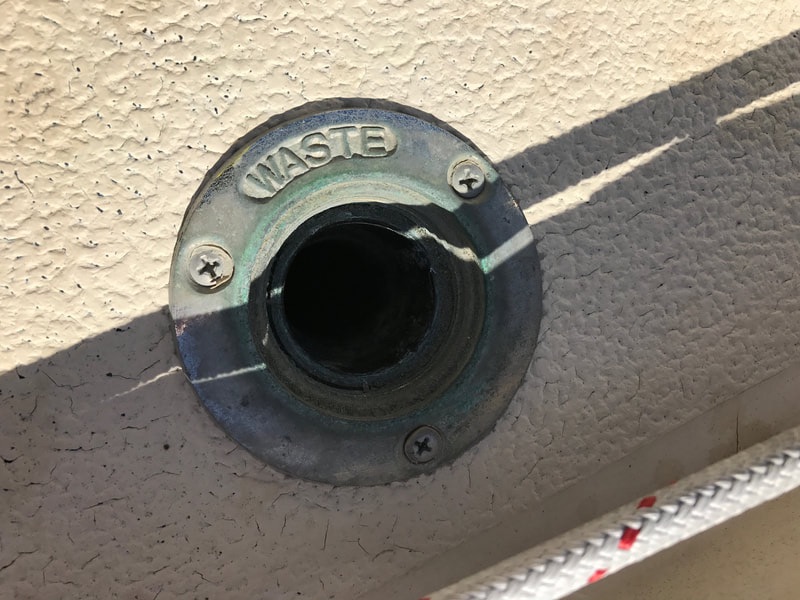 You really cannot imagine the aromas this little space is capable of emitting. Feeling a little bit redeemed by a successful shit removal, we discussed our dock departure plan and left with more confidence and cooperation than we arrived with. Maybe someday we'll learn not to make a shitty situation worse by being shitty to each other. Or we'll become experts at name calling and eye rolling.
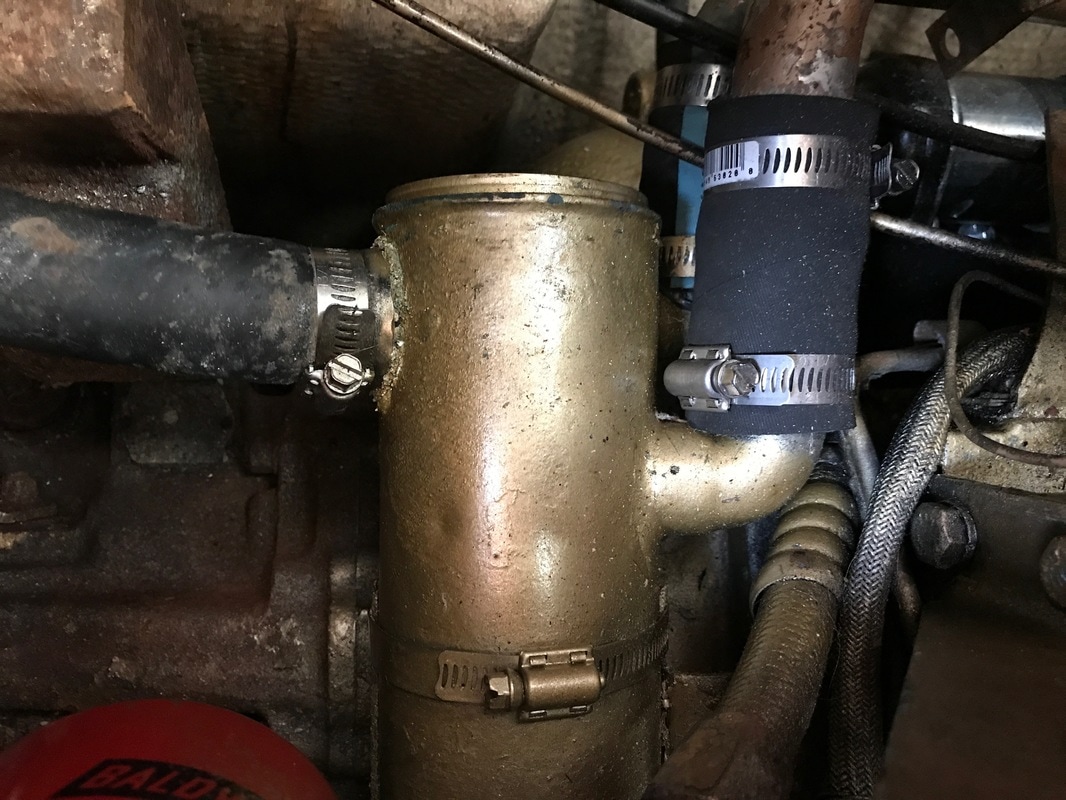
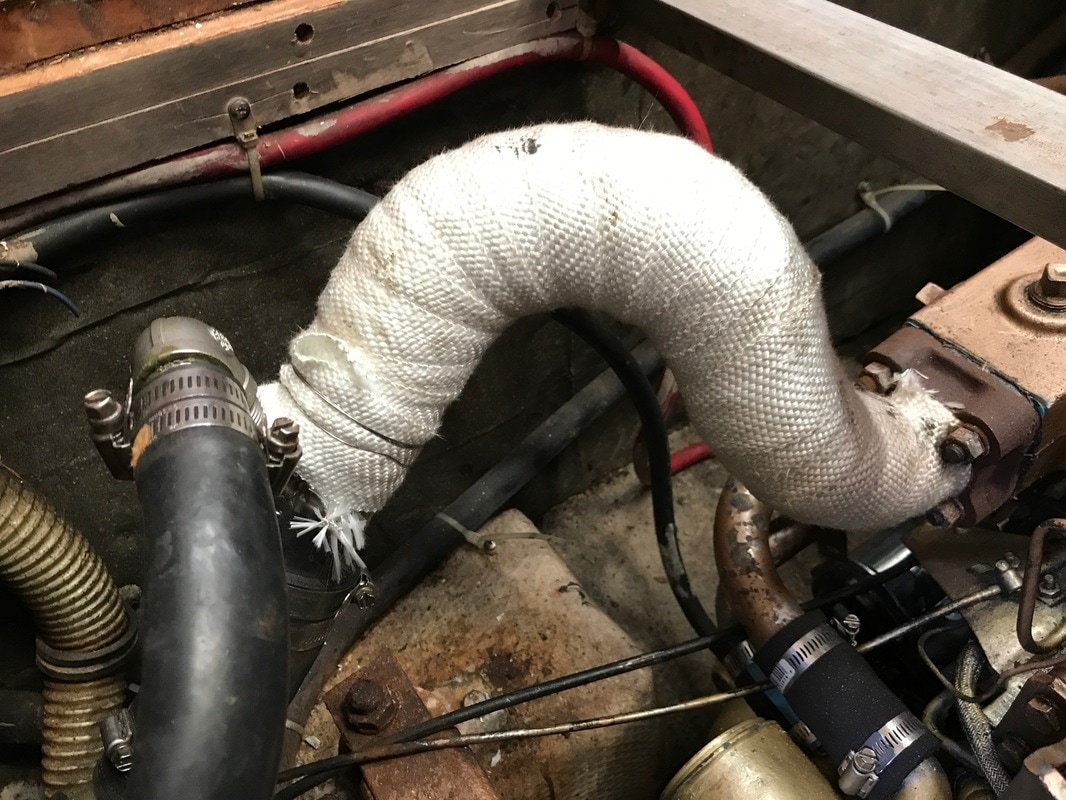
Mack spent some time in his favorite place on Kenutu -- under her floorboards -- and came up needing a lot of repairs. It all started with an alternator rebuild. The shop he went to, Wayne Electric, did great work and were fast and reasonably priced. And they gave him a magnetic titty calendar. Which is why I think he went looking for more work to be done. 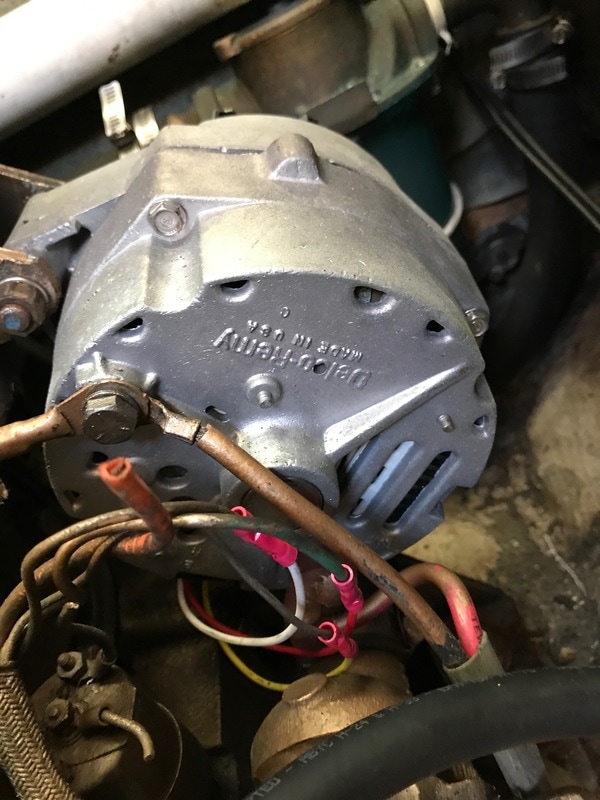 This is an alternator. It recharges the batteries when the engine is running. I am learning so much. Chris from RS Marine met us aboard Kenutu and brainstormed some repairs that could improve her performance. A rebuilt starter was on the menu, as was a new exhaust elbow. Along the way, someone had taken the exhaust pipe and made it smaller on its way out, which was apparently dumb. Chris also suggested a rebuilt manifold, which we knew we needed because we'd already applied some JB Weld to a leak on it. 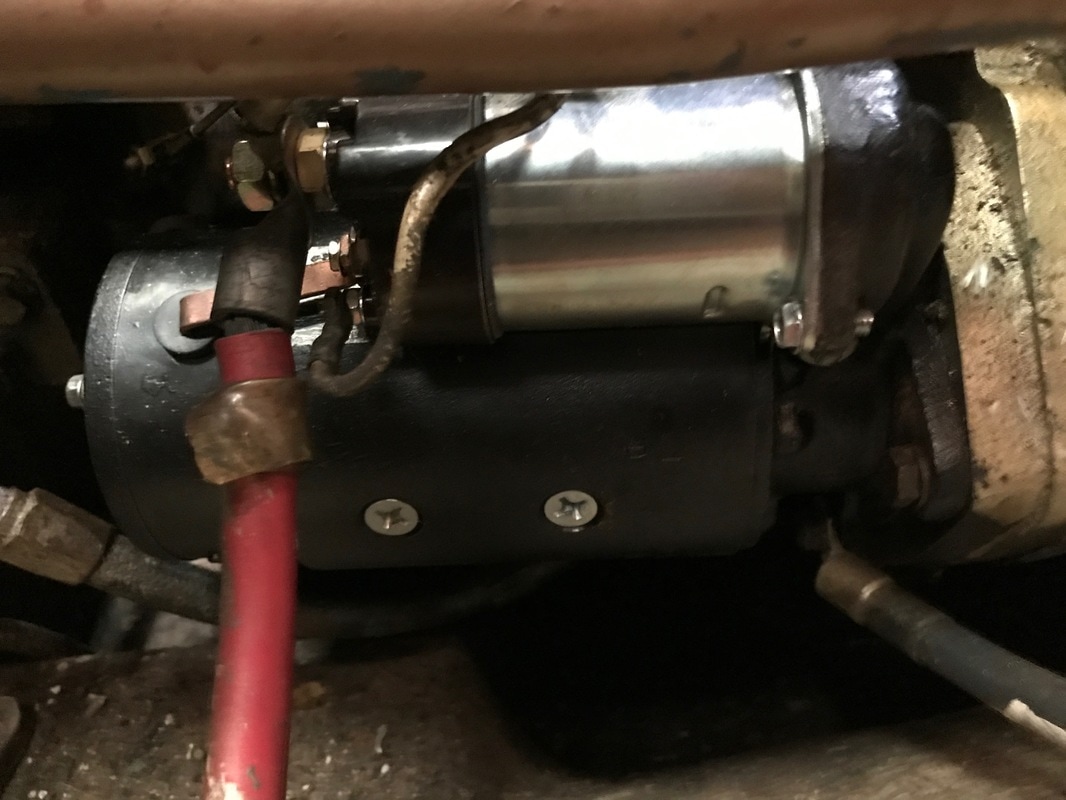 This is a starter with a solenoid on top. The starter (the black thing) helps the engine start and the solenoid (the silver thing) controls power to the starter.
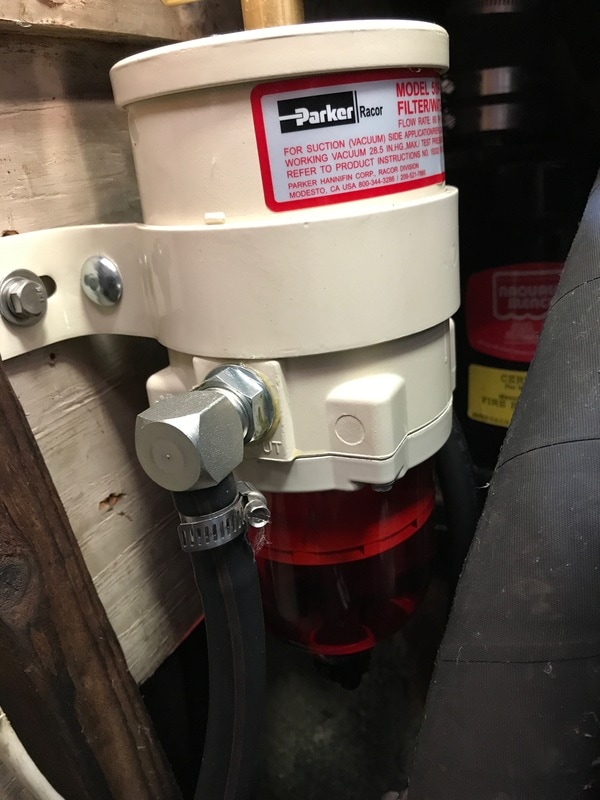
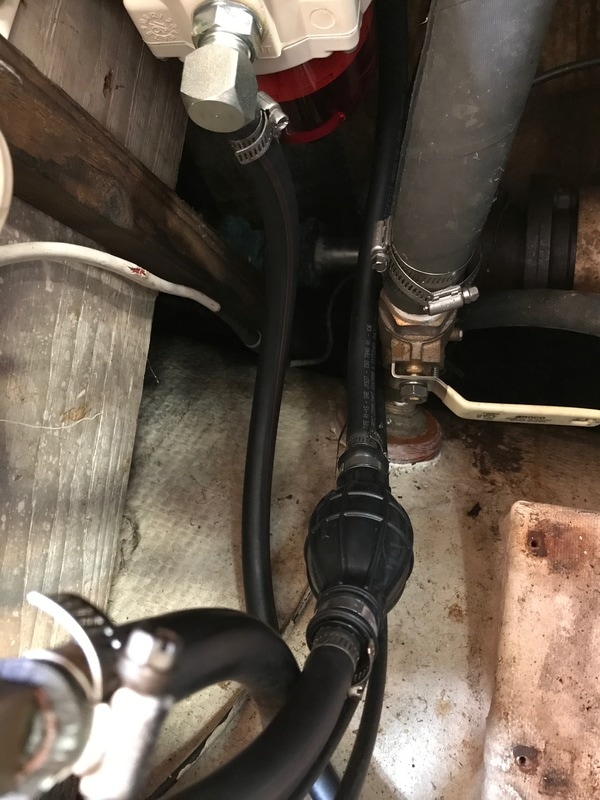
A couple of fuel filters made it onto the list, since Mack had ordered them online anyway. The ones on Perky had some cumbersome screws and multiple connections, which Chris pointed out would make you want to sink the boat if you had to change the filters and bleed the lines out in the middle of the ocean in waves. The solution was to update the fuel/water separator and the secondary fuel filter with more accessible features and add a pump to make it easy to bleed the lines.
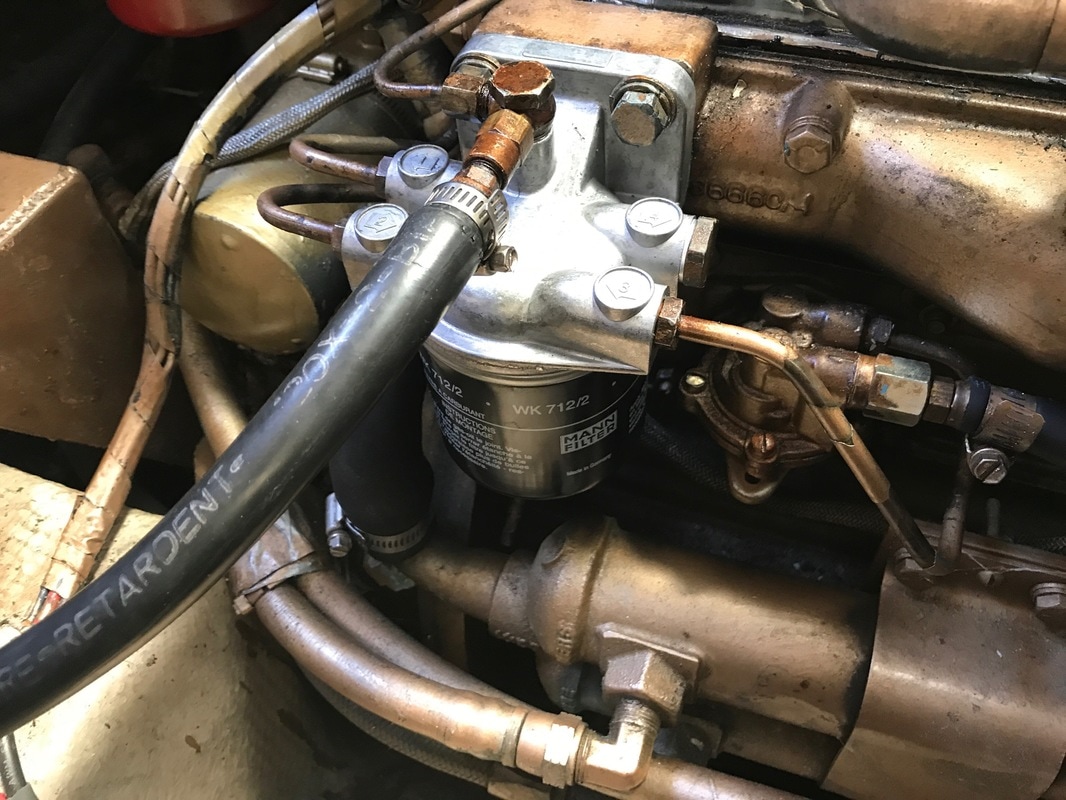 The old version made you unscrew four things at the top, which you would certainly drop into the bilge abyss. This one lets you unscrew that black thing, fill a new one with fuel, and then screw it in place. Presto chango. As a bonus Chris cleaned up all the gunk on the engine and showed us that revving it and changing gears in the dock is no big deal. Oh, and he left us this very comforting note. 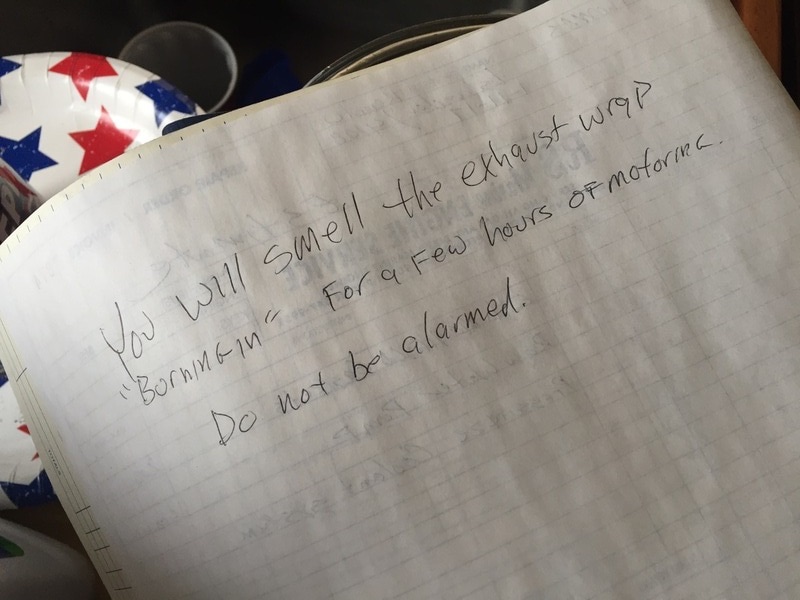 Perky always hummed, but with these updates she's absolutely purring. Mack's favorite place is now a happy place.
|
AuthorTwo people dumb enough to think anything is possible and smart enough to bumble their way into discoveries. Archives
September 2018
CategoriesMates |
 RSS Feed
